Eclipse
Targets of this tutorial
- Integrating OSELAS toolchain into a graphical IDE based on Eclipse
- Creating and compiling a small project
- Debugging an application on the module
Used versions
- Ubuntu 14.04
- Eclipse Luna
- PTXdist 2013.12.0
- OSELAS toolchain 2013.12.2
Prerequisites
Host
- Installed PTXdist
- Installed OSELAS toolchain
- Installed Java Runtime Environment
Target
- Target system with operating RootFS
- gdbserver
- OpenSSH with sshd and sftpd
- User with password (needed for ssh remote access)
- Network connection to development host
Configuring host system
Download and install Eclipse
First download Eclipse package and extract it to /home/<user>/eclipse.
For the correct execution of Eclipse with the OSELAS toolchain you have to create two files in your home folder
1. setup_tqma6x
- Generic:
PATH=PATH:/path/to/your/OSELAS.Toolchain<version>/<cross compiler name>/gcc-<version>-glibc-<version>-binutils-<version>-kernel-<version>-sanitized/bin
export CROSS_COMPILE=<cross compiler name>
- For this tutorial:
PATH=$PATH:/opt/OSELAS.Toolchain-2013.12.2/arm-v7a-linux-gnueabihf/gcc-4.8.3-glibc-2.18-binutils-2.24-kernel-3.12-sanitized/bin
export CROSS_COMPILE=arm-v7a-linux-gnueabihf-
2. eclipse_tqma6x
#!/bin/bash
source ~/setup_tqma6x
cd ~/eclipse
./eclipse &
Open a new terminal and enter ./eclipse_tqma6x to start Eclipse with the correct parameters.
In this tutorial setup_tqma6x and eclipse_tqma6x are created in the home folder, Eclipse is installed in the home folder too. If Eclipse was installed in another folder you have to set the paths to the Eclipse installation folder.
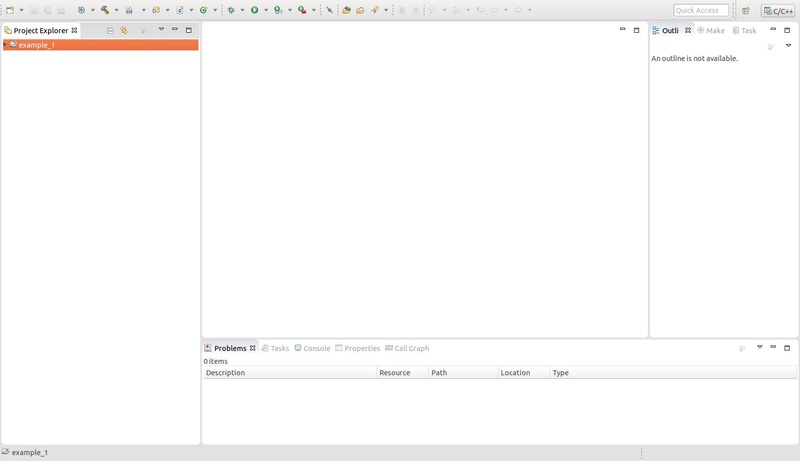
Creating a new project
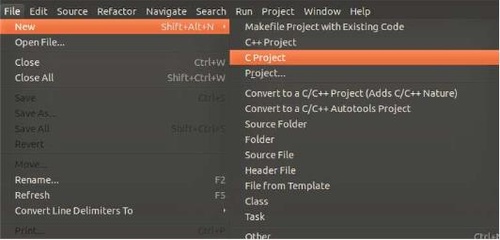
Select File → New → C Project to create a new project
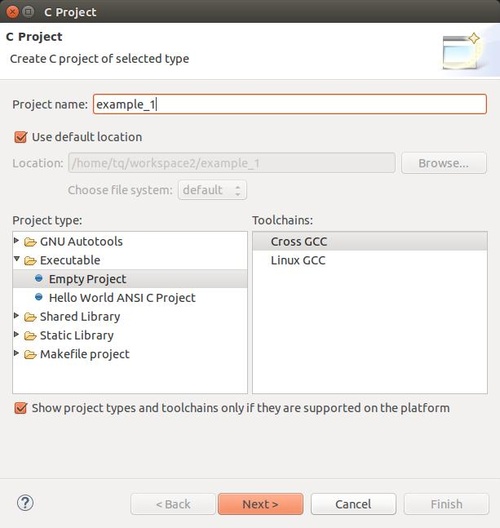
In the C Project window enter a name for the new project (in this case : example_1). Select Empty Project as project type and check Cross GCC in the Toolchains section.
Click the Next button
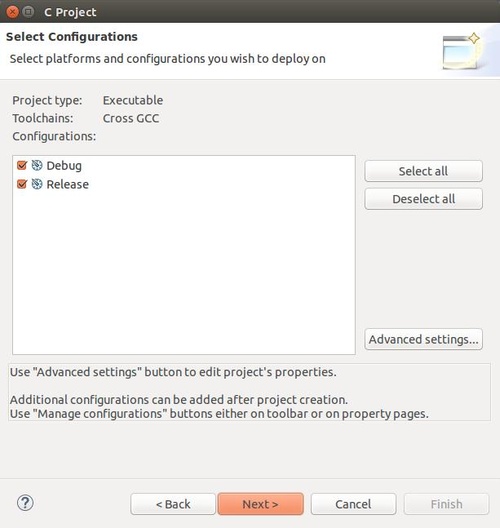
In the following window keep in mind that both configurations Debug and Release are checked, then click on Next.
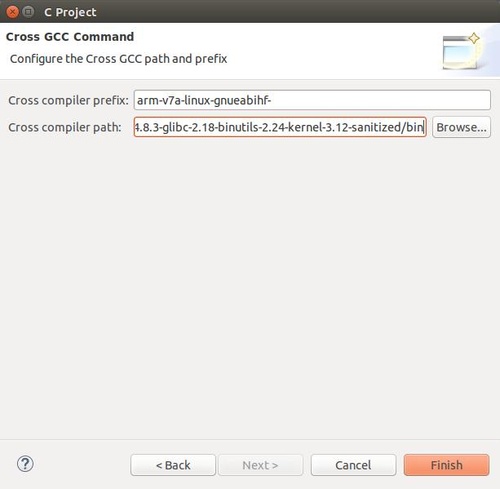
In the next window you have to set the Cross compiler prefix and Cross compiler path.
- Generic:
- Cross compiler prefix: <cross compiler name>
- Cross compiler path: /path/to/your/OSELAS.Toolchain<version>/<cross compiler name>/gcc-<version>-glibc-<version>-binutils-<version>-kernel-<version>-sanitized/bin
- In this tutorial:
- Cross compiler prefix: arm-v7a-linux-gnueabihf-
- Cross compiler path: /opt/OSELAS.Toolchain-2013.12.2/arm-v7a-linux-gnueabihf/gcc-4.8.3-glibc-2.18-binutils-2.24-kernel-3.12-sanitized/bin
Finally click on Finish, now the environment for our new project is created.
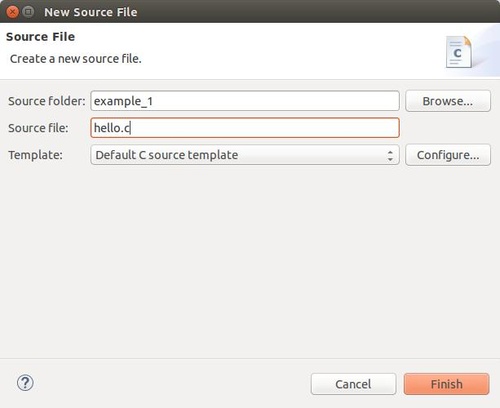
First, a source file for new project must be created. Select File→New→Source File To create the source file.

enter a name for the Source file in the popup windows (including file extension). In this case the Source file is named “hello.c”
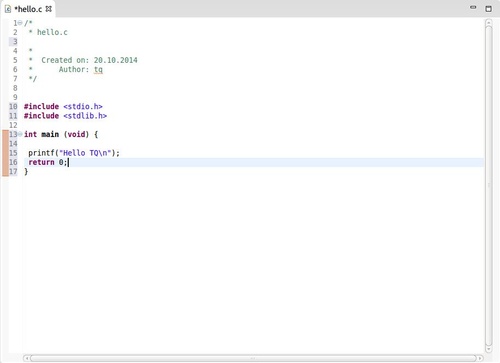
Once the source file has been generated, it can be filled with code, in this tutorial, it is a simple “Hello World” application.
As final step before compiling, we use two variables within the project. example_1 must be clicked with the right mouse button, select Properties from the context menu.
In the popup window expand the menu item C/C++ Build and select Settings.
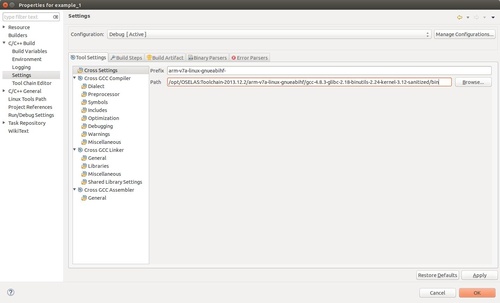
The variables Prefix and Path in the Cross Settings must be set. For this tutorial:
- Generic
- Prefix: <cross compiler name>
- Path: </path/to/your/OSELAS.Toolchain-<version>/<cross compiler name>/gcc-<version>-glibc-<version>-binutils-<version>-kernel-<version>-sanitized/bin
- In this tutorial:
- Prefix: arm-v7a-linux-gnueabihf-
- Path: /opt/OSELAS:Toolchain-2013.12.2/arm-v7a-linux-gnueabihf/gcc-4.8.3-glibc-2.18-binutils-2.24-kernel-3.12-sanitized/bin
The variables must set twice; once for the configuration Release and once for the configuration Debug.
The configuration could be selected from the dropdown menu in the upper part of the window. After variables have been set for both configurations, click the OK button.
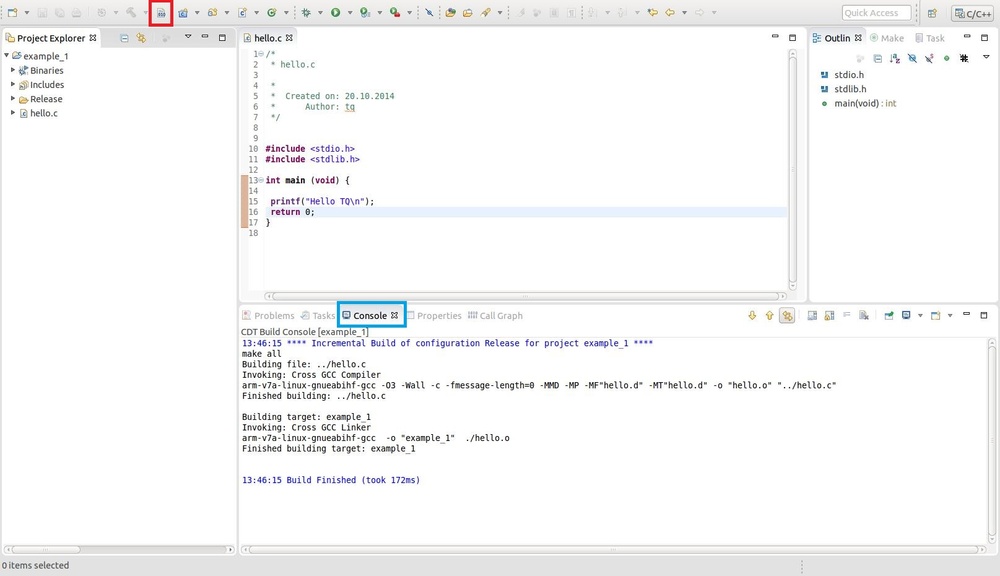
Before you compile the project you must save it, otherwise errors could appear while compiling the project.
Click the button Build All (marked with a red frame in the picture) to compile the project. You can watch the compiling process in the central lower part of the main window over the Console tab.(marked with a blue frame in the picture)
Compiling including the kernel sources
To compile source code that refers to to the kernel header you have to add a variable in your project, to let the compiler know where to find these recources. Open the project properties to set the variable (right click on the project → Prooerties). Open C/C++ General / Path and Symbols section, enter the tab Includes and choose GNU C in the Languages section.
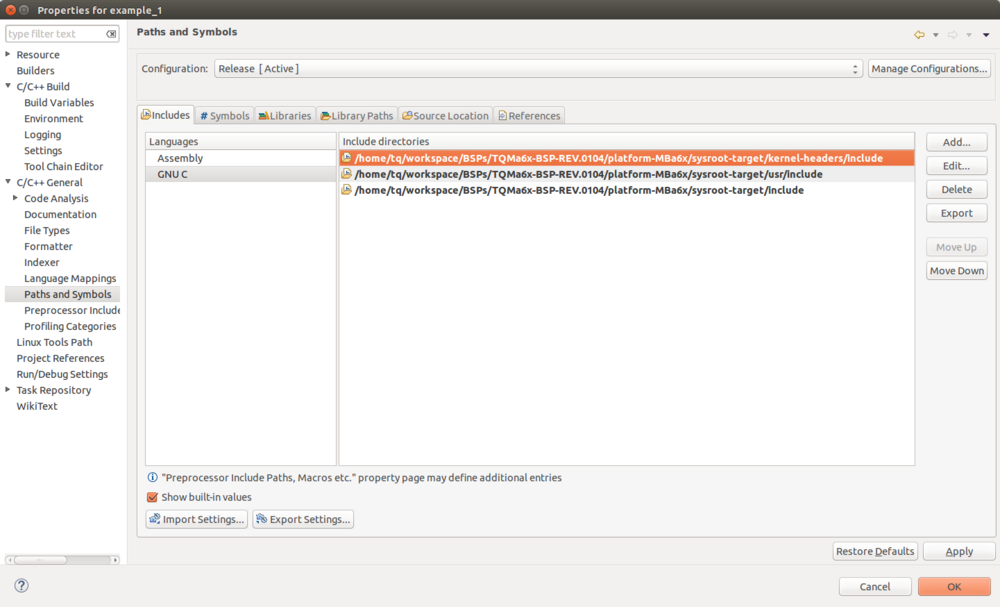
An entry must be added in the Include directories section to refer to the Kernel. Click on the Add button, in the popup window enter the path that refers to the kernel. In this tutorial:
/home/tq/workspace/BSPs/TQMa6x-BSP-REV.0104/platform-MBa6x/sysroot-target/kernel-headers/include
Check the option Add to all configurations to set the path only once.
Additional paths could be added to include packet header or libraries. In this tutorial:
- /home/tq/workspace/BSPs/TQMa6x-BSP-REV.0104/platform-MBa6x/sysroot-target/usr/include
- /home/tq/workspace/BSPs/TQMa6x-BSP-REV.0104/platform-MBa6x/sysroot-target/include
Remote connection to the target
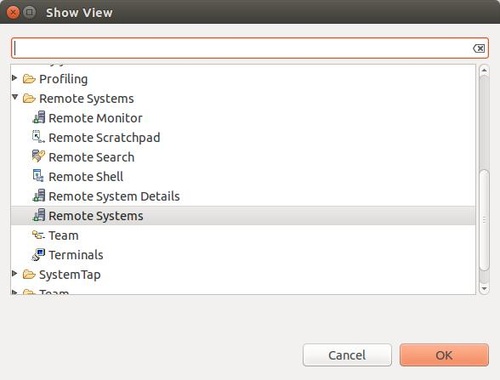
RSE (Remote System CSR-Tool Explorer) is used to establish a connection to the Target. In this case it is the TQMa6Q. Go to Window → Show view → Other… to add the window for the RSE, then choose Remote Systems and in the dropdown menu Remote Systems.
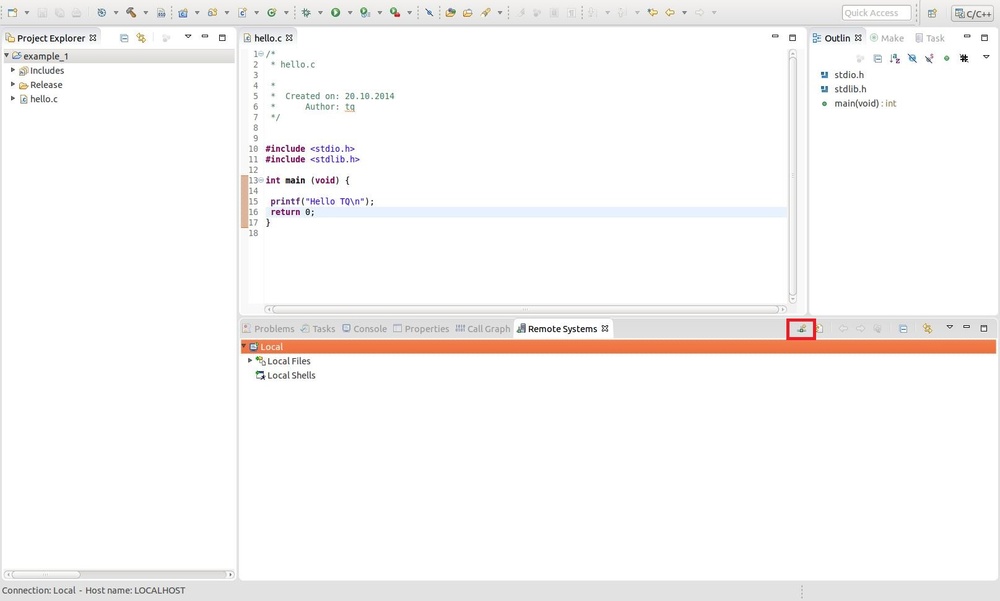
Click on the Connection icon (marked with a red frame in the picture below) to add a new connection.
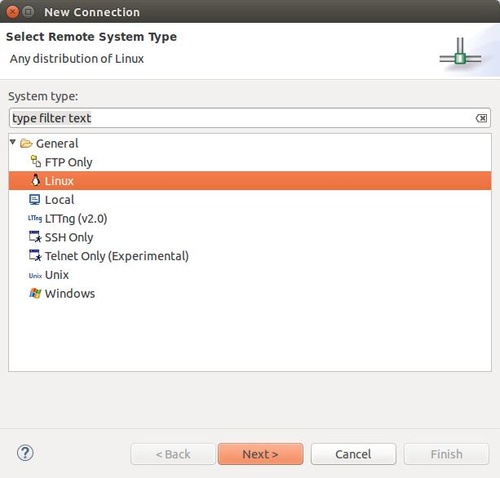
Choose the remote type in the new window. In the case of this tutorial Linux then click on Next
Set the connection parameter in the next window
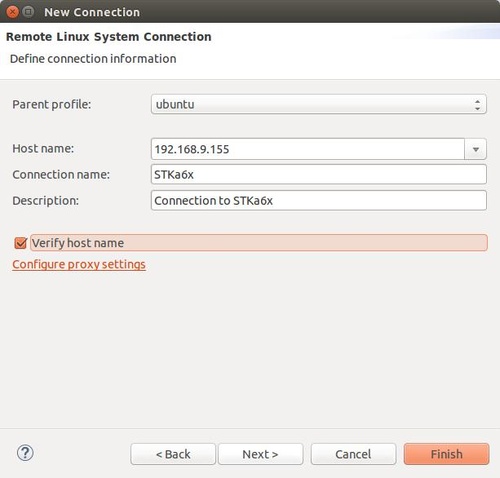
- Host name: enter host name or IP address of the target
- Connection name: enter a name for the connection
- Description: a short description for the connection
Then click Next.
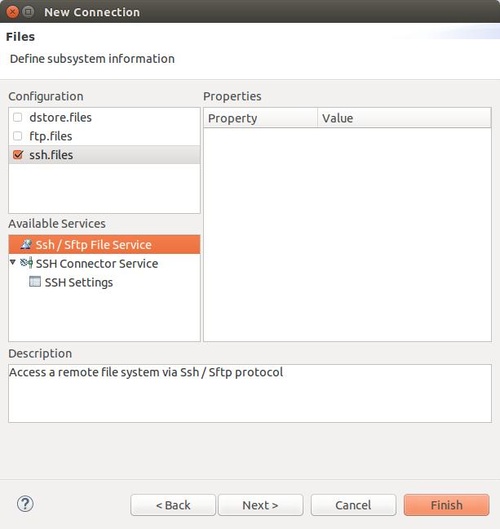
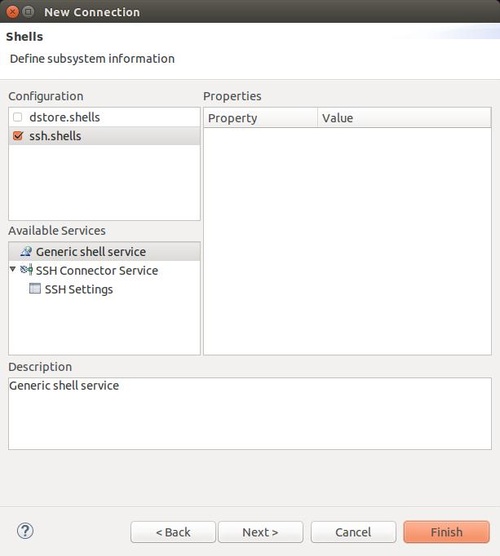
select ssh.files in the following window then click Next.
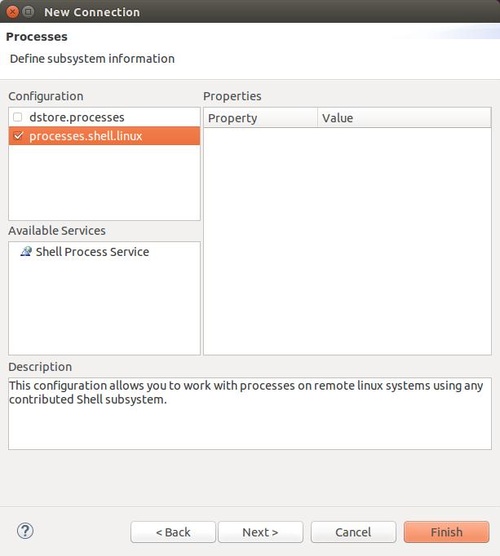
Check processes.shell.linux in the following window and click Next.
check ssh.shells in the last windows and finally click Finish.
Debug an application
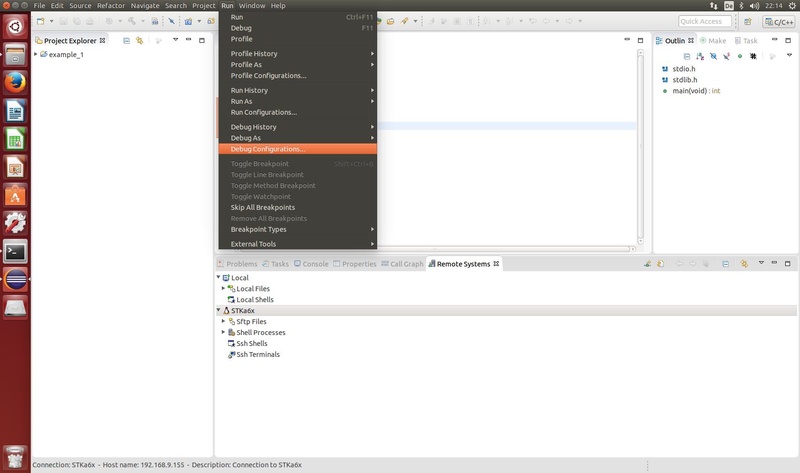
Open the debugger Run → Debug Configurations
a new C/C++ remote application must be created by right clicking on C/C++ Remote Application then choose New Now we have to set:
Name: Name for the C/C++ debug application
C/C++ Application: click Search Project and select the debug build from your project
Project: select the project you want to debug
Connection: choose the Connection that was created earlier in this tutorial.
Remote Absolute File Path for C/C: enter the path where the application will be copied and executed on the target.
Commands to execute before application: use this to launch a gdb server on the target before debugging.
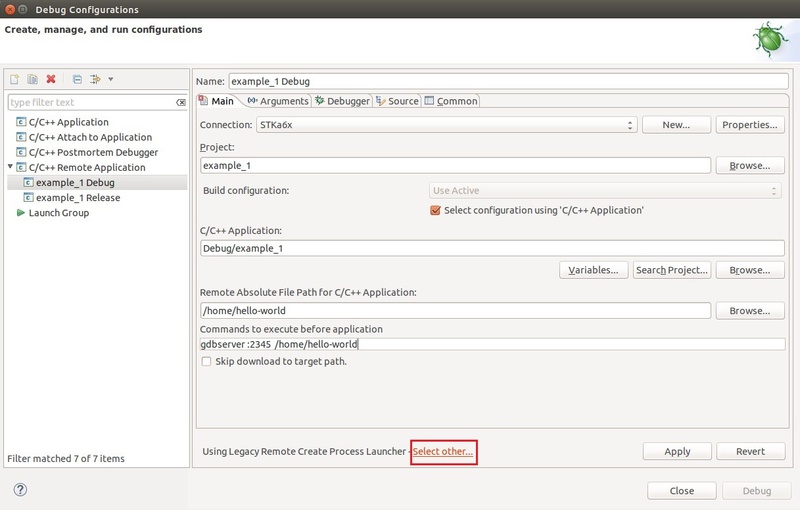
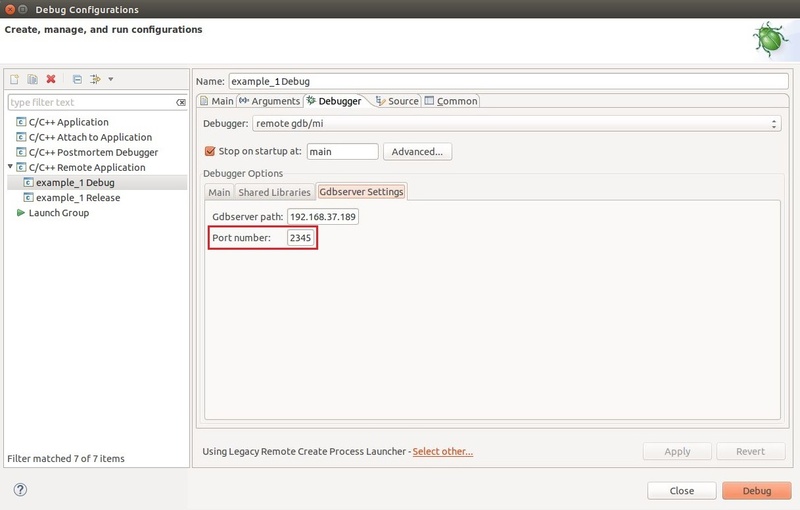
After the command you want to execute you have to set the installation path of the application you want to debug and the port number, which you can find under Debug Configurations/ Debugger/ Gdbserver Settings. Gdbserver path is the same IP you have set during configuration of the remote system.
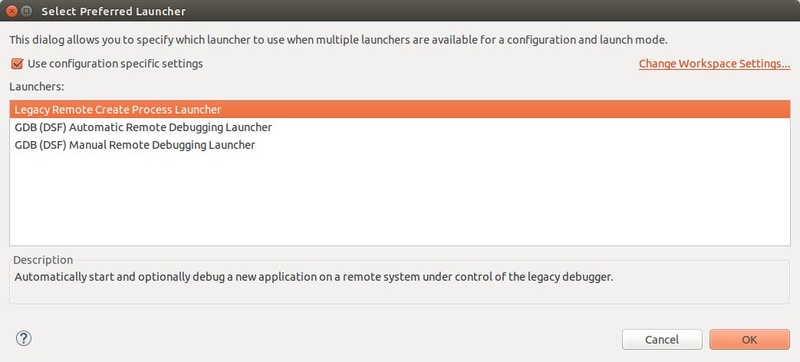
Select Process Launcher by clicking Select other… (marked with a red frame in the picture above)
Check Use configuration specific settings and select Legacy Remote Create Process Launcher
close the window by clicking OK.
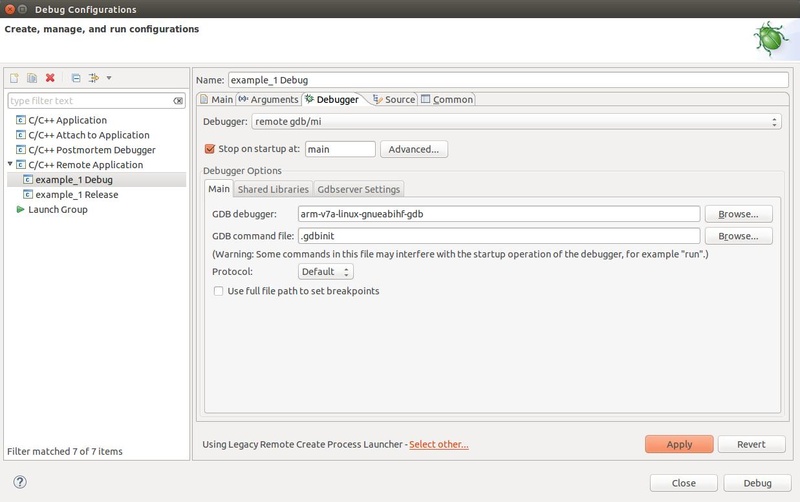
Select the Debugger tab from Debug Configurations main window. Now we have to set the GDB debugger in the case of this tutorial arm-v7a-linux-gdb.
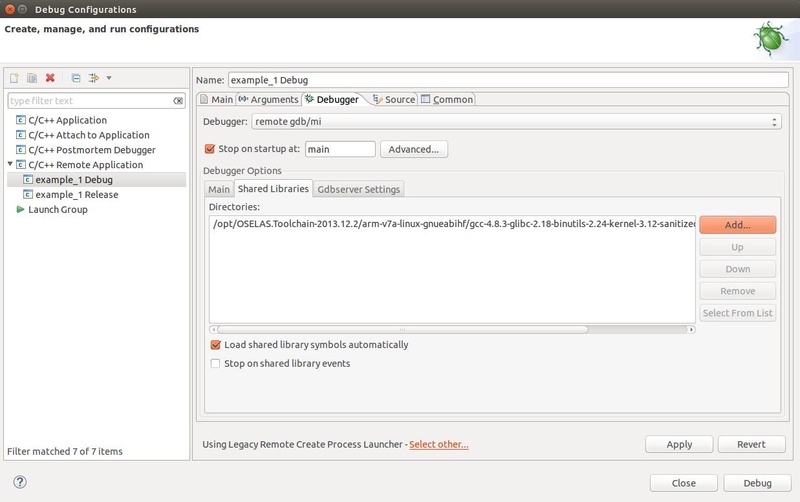
Switch to Shared Libraries tab inside the Debugger tab and add the path to the libraries in your system in the case of this tutorial opt/OSELAS.Toolchain-2013.12.2/arm-v7a-linux-gnueabihf/gcc-4.8.3-glibc-2.18-binutils-2.24-kernel-3.12-sanitized/arm-v7a-linux-gnueabihf/lib.
Finally click Apply and then Debug
If the application requires consultation results on a Remote Shell (as is the case this tutorial because printf) can be enabled by selecting this view within the Display Selected Console options: