Installation of system software on the eMMC flash
ATTENTION: The following modifications must be applied to the MBa28 prototype board:
- Fix pull-ups boot mode
- Fix PHY addresses
- Fix pull-downs TFT display
Installation of the MFG-Tool
First of all the MFG-Toolkit from Freescale needs to be installed on your PC. In case you already registered with Freescale it is available for download at the following URL:
Just unzip the downloaded archive to a folder of your choice.
Software archives
The system software for the TQMa28 module can be found here:
- MFG Profile Linux Installation (tqma28-mfg-linux-update-yyyymmdd-nn.zip)
- MFG Profile U-Boot-Start (tqma28-mfg-u-boot-yyyymmdd-nn.zip)
After downloading unzip the archives into the subfolder Profiles of the MFG-Tool installation folder. This will create two new directories:
- TQMa28-Linux-Update
- TQMa28-U-Boot
The second profile (“TQMa28-U-Boot”) does not install anything on the flash, it only launches U-Boot. However, when saving the environment within U-Boot, it will be saved to flash.
DIP switch settings (rescue mode)
In order to enable the rescue mode set the DIP switches on the MBa28 as illustrated below:
Installation
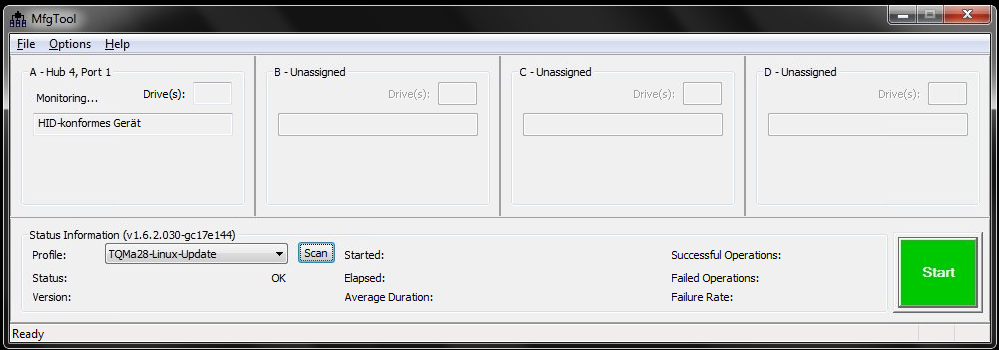
After connecting your PC with a USB type A-A cable to the upper USB socket on the MBa28 mainboard, you can start the MFG tool. Now power on the MBa28 mainboard. The field “A-Hub” should then show “HID-konformes Gerät”.
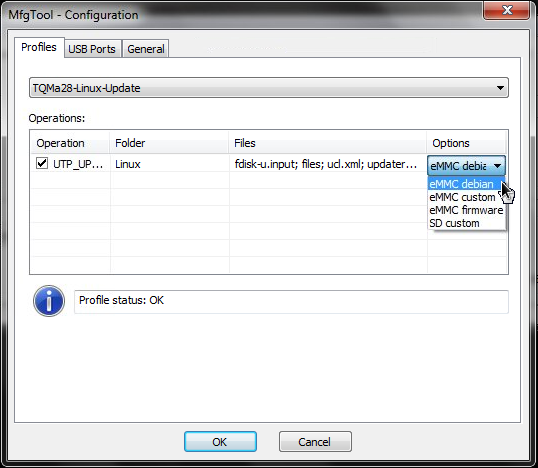
Select “TQMa28-Linux-Update” from the “Profile:” dropdown. Make sure the correct configuration is selected (Options → Configuration). There are four installation options to select from:
| Option | Target | Description |
|---|---|---|
| eMMC debian | eMMC | U-Boot, Kernel, Debian Squeeze Rootfs |
| eMMC custom | eMMC | U-Boot, Kernel, minimal rootfs with X11 and SSH-Login |
| eMMC firmware | eMMC | U-Boot, Kernel, no rootfs |
| SD custom | SD-Card | U-Boot, Kernel, minimal rootfs with X11 und SSH-Login |
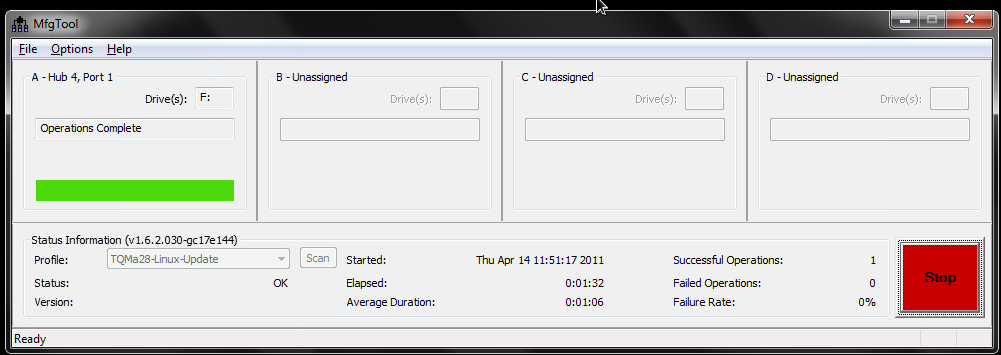
Now select the button “Start” to program U-Boot, linux kernel and root filesystem to the eMMC flash. This operation takes approx. 2 to 20 minutes (depending on the size of the root filesystem). If all went ok the progress bar changes from blue to green.
Booting the system
Remove the USB cable from the MBa28 mainboard and the PC.
Set the DIP switches according to your installation target. If you had chosen eMMC as target set the DIP switches to the following configuration
If you installed the image on the SD-Card use the following configuration
Now reset the system using the reset button.
To boot the kernel and the root filesystem from the SD card you have to change the following variable in U-Boot:
setenv mmcdev 1
saveenv
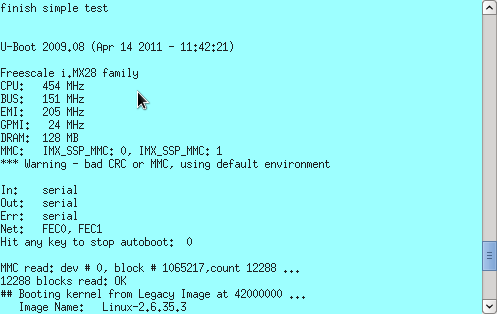
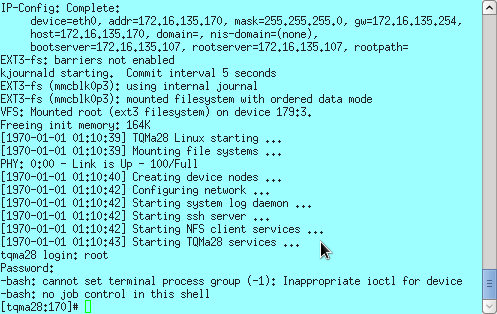
At the console you can see the output of the boot process. The following screenshot shows the boot process for the “custom” root filesystem:

