Installing LTIB (Linux Target Image Builder)
Preparation
Requirements
This guide is based on an Ubuntu system from version 10.04. It can either be a native operating system or an installation in a virtual machine.
Download installation sources
Either copy the source file (L2.6.35_11.01.00_ER_source_tq.tar.gz) from the supplied CD or download the LTIB TQMa35 package, which contains the source file, from
the TQMa35 product page under Downloads.
Extract the source code with:
user@ubuntu:~/source$ tar -xvf L2.6.35_11.01.00_ER_source_tq.tar.gz
Installing required packets
sudo apt-get update
sudo apt-get install build-essential zlib1g-dev rpm libncurses5-dev m4 bison liblzo2-dev uuid-dev tcl
Configuring sudo
The LTIB installation script runs several commands with sudo where the user should not be prompted for a password. sudo without password must be configured for the current user to execute the script correctly. Therefore with
sudo visudo
the file /etc/sudoers is opened for editing.
The following line should be inserted in the file, where user has to be changed to your user name:
# Allow user to run commands for ltib.
user ALL = NOPASSWD: /usr/bin/rpm, /opt/freescale/ltib/usr/bin/rpm
Save with Ctrl+o, then close with Ctrl+x.
Create installation directory
Change to directory /opt, create a new directory for LTIB and assign to the current user.
user@ubuntu:/$ cd /opt/
user@ubuntu:/opt$ sudo mkdir ltib_iMX35
user@ubuntu:/opt$ sudo chown user:user ltib_iMX35/
Perform installation
Run the install script in the directory of the installation sources:
user@ubuntu:~/source/L2.6.35_11.01.00_ER_source_tq$ ./install
Read and accept the EULA.
Enter /opt/ltib_iMX35 as choice of directory.
Then change to directory /opt/ltib_iMX35/ltib.
Set LTIB proxy
Depending on the local Internet connection an HTTP proxy has to be set in the file ltib/.ltibrc and the use of the proxy when accessing the Global Package Pool.
%http_proxy
http://proxy.address:port

%gpp_proxy
1
Configure LTIB
user@ubuntu:~$ cd /opt/ltib_iMX35/ltib
user@ubuntu:/opt/ltib_iMX35/ltib$ ./ltib
Should there be a problem with Ubuntu 11.04, indicating that glibc-devel and zlib are not detected as installed, the file ltib/bin/Ltibutils.pm must be edited.
For a 32-bit system:
Line 563:     'glibc-devel'    => sub { -f '/usr/lib/libm.so' || -f '/usr/lib64/libz.so'},
change to:    'glibc-devel'    => sub { -f '/usr/lib/libm.so' || -f '/usr/lib64/libz.so' || -f '/usr/lib/i386-linux-gnu/libm.so'},

Line 585:                                    glob('/lib64/libz.so*')  ); @f > 1 ? 1 : 0 },
change to:                                   glob('/lib64/libz.so*'), glob('/lib/i386-linux-gnu/libz.so*')  ); @f > 1 ? 1 : 0 },
For a 64-bit system:
Line 563:     'glibc-devel'    => sub { -f '/usr/lib/libm.so' || -f '/usr/lib64/libz.so'},
change to:    'glibc-devel'    => sub { -f '/usr/lib/libm.so' || -f '/usr/lib64/libz.so' || -f '/usr/lib/x86_64-linux-gnu/libm.so'},

Line 585:                                    glob('/lib64/libz.so*')  ); @f > 1 ? 1 : 0 },
change to:                                   glob('/lib64/libz.so*'), glob('/usr/lib/x86_64-linux-gnu/libz.so*'), glob('/lib/x86_64-linux-gnu/libz.so*')); @f > 1 ? 1 : 0 },
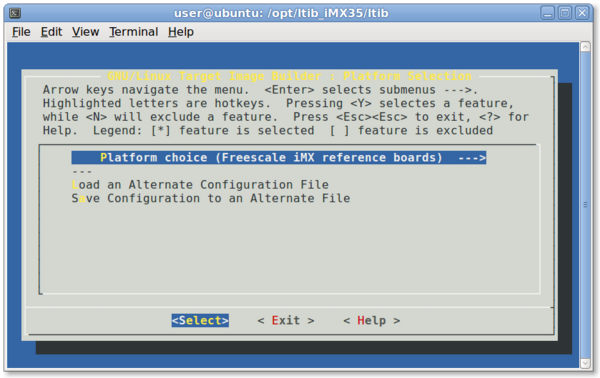
A graphical menu to select the platform appears after a while. Select Platform choice and press Enter.
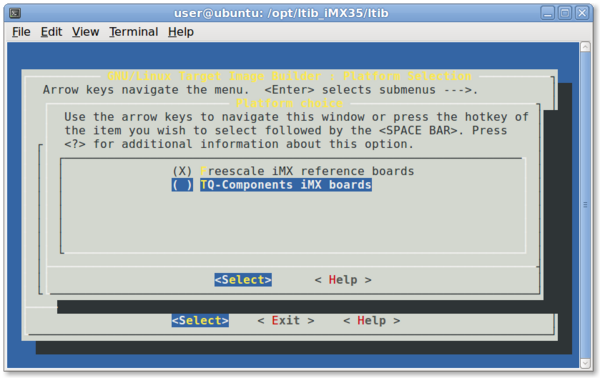
Select TQ-Components iMX boards in this window and press Enter
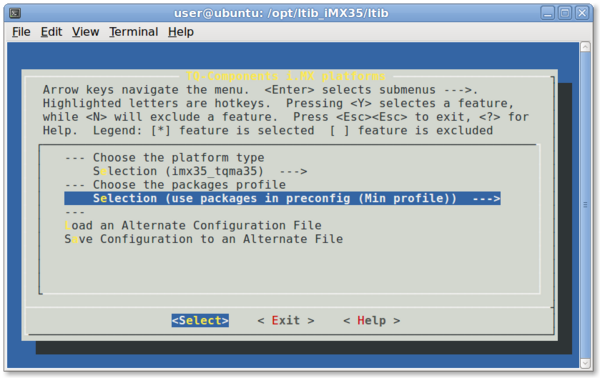
Then select < Exit >. Different profiles for the rootfs can be selected in the next window.
We first use the Min profile. All options are shown again in the next window. Nothing has to be changed there. The wizzard is closed with < Exit > and the selected operations are performed.
The success message at the end should look like this:
Started: Fri Jul 15 02:56:23 2011
Ended:   Fri Jul 15 03:48:20 2011
Elapsed: 3117 seconds

Build Succeeded

user@ubuntu:/opt/ltib_iMX35/ltib$
NFS
The following line has to be added to /etc/exports to access the rootfs via NFS. Also see Installation from NFS server
/opt/ltib_iMX35/ltib/rootfs 192.168.30.0/24(rw,no_root_squash,sync)


