Setup the EAPI in Visual Studio for development
Prerequisites
- Download and Install VisualStudio1) (visit Website)
- Current version of the Windows EAPI (EAPI Overview)
Install VisualStudio IDE
To install Visual Studio, the installer must be downloaded and executed.
Follow the installer until you reach the workload selection.
Now the packages have to be selected, which are needed for the corresponding application.
The EAPI consists of C code and therefore in this example the package "Desktop development with C++" is used.
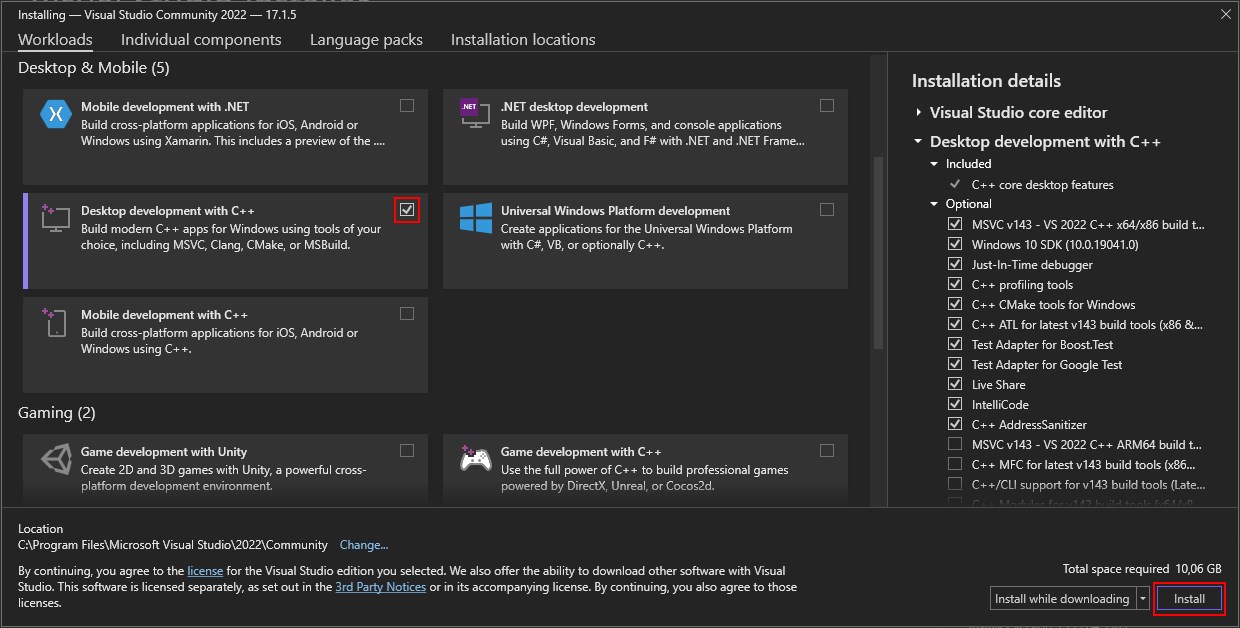
After that they have to be installed by clicking install.
Follow the instructions of the installer for the setup of Visual Studio.
Setup EAPI project
create new project
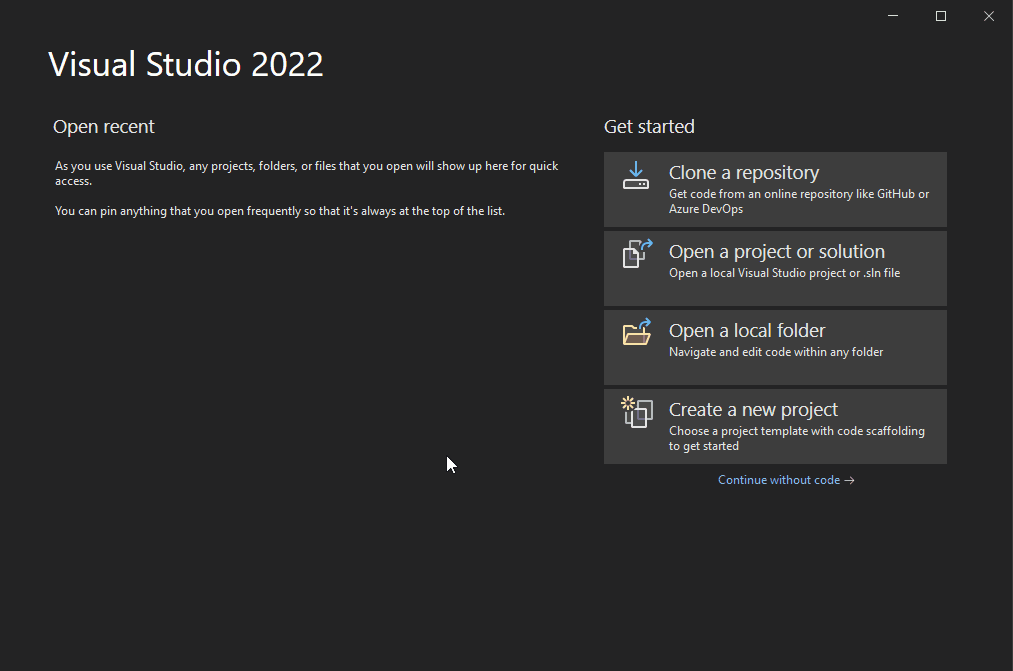
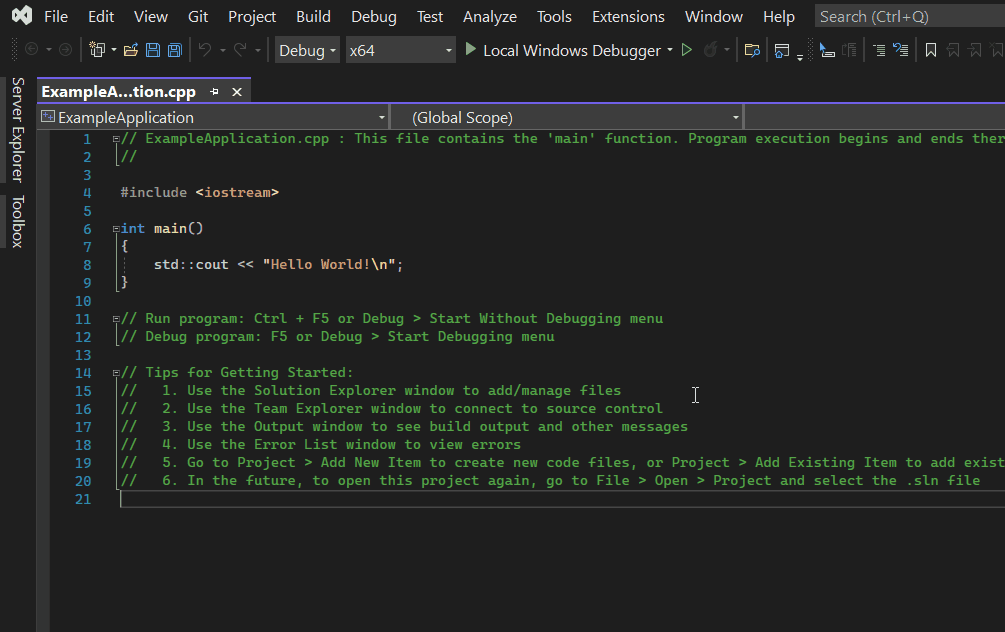
After installation, Visual Studio can be started from the Start menu.
After the initial setup, the IDE start page should be displayed.
Here a new project must be created, in which the EAPI can then be integrated and used in the own application.
For this example, we use a C++ console app for the first application.
Copy EAPI header and Libraries to project
To use the EAPI functions, the libraries and headers must be included in the project.
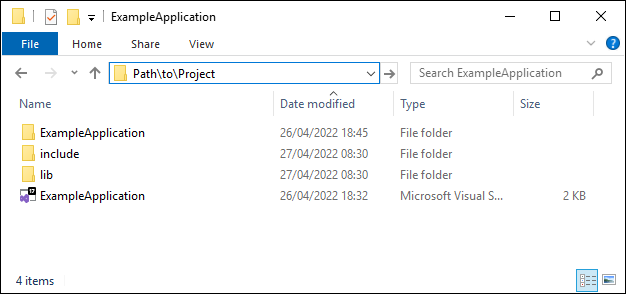
1. Unpack the EAPI archive and open the EAPI folder (e.g. TqWin64EAPI_R01.05)
2. Go to the SDK folder and copy the folders Include and lib into the Project folder
Configure Visual Studio Project
For the use of the just copied libraries and header files it is necessary to add them to the project properties.
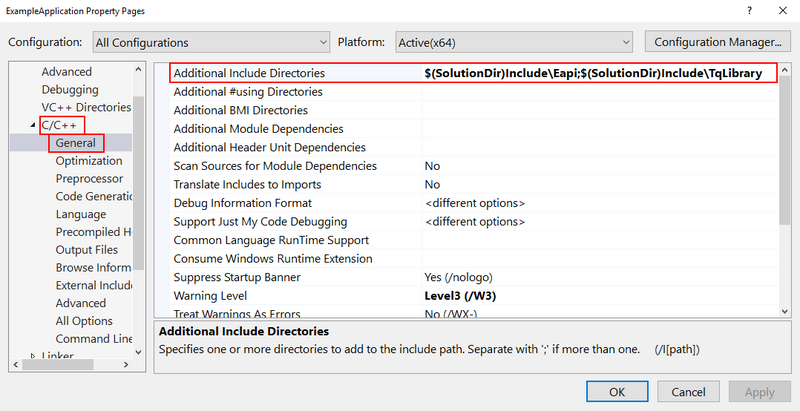
1. Open the project properties under Project → ExampleApplication Properties
2. In the Property Pages window, navigate to C/C++ > General and enter the paths to the previously copied include files (header files):
$(SolutionDir)Include\Eapi;$(SolutionDir)Include\TqLibrary;
You can also use an absolute path, e.g.: C:\workspace\ExampleApplication\
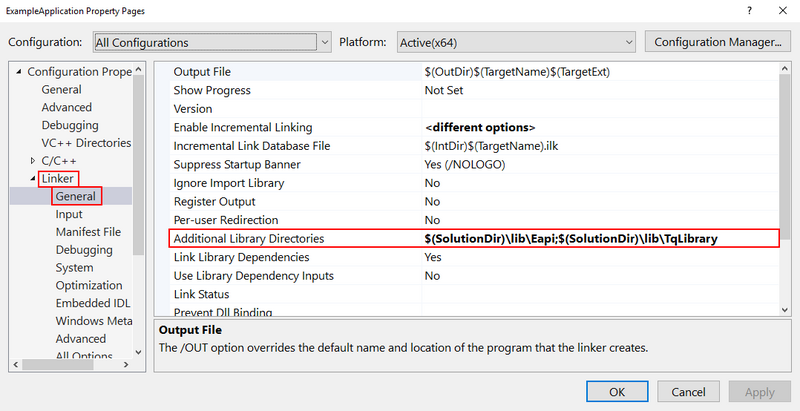
3. navigate to Linker > General and enter the paths to the previously copied include files:
$(SolutionDir)\lib\Eapi;$(SolutionDir)\lib\TqLibrary
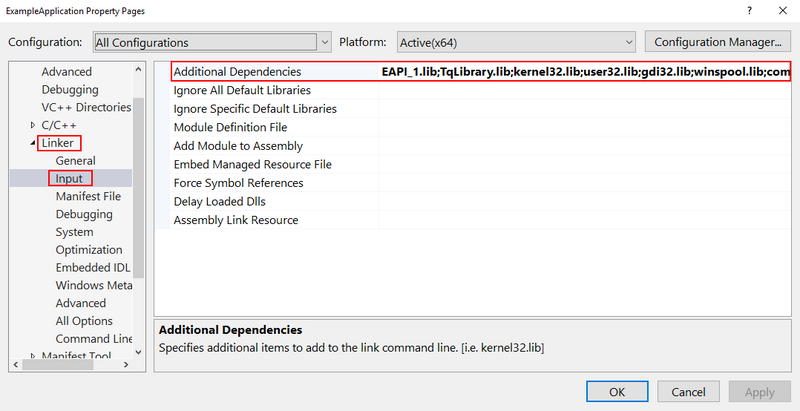
4. navigate to Input and include the .lib files as Additional Dependencies:
EAPI_1.lib;TqLibrary.lib;
Important
The existing entries in the field must not be overwritten!
The EAPI entries can simply be added at the beginning of the line.
5. Press the OK button to save and close the Properties window.
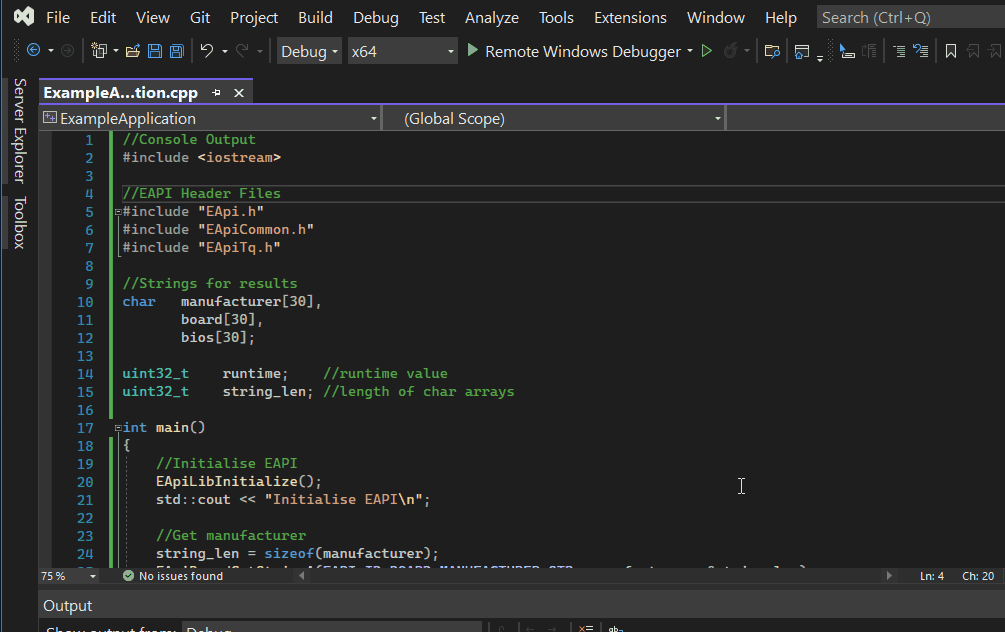
Create simple EAPI Application
After configuring the project, the development of the application can be started. For a simple example, the existing code must be deleted and replaced with the following example code
After the code has been integrated into the project, the project can be built. Now the executable application for the target system will be created.
To build the project you need to click the button under Build > Build ExampleApplication (Shortcut: Ctrl + B)
However, when the application is executed automatically, an error occurs because the application only works on a Taget system with EAPI installed.
Setup Remote Debugger on Target
In order to test the programmed application on the target system, the Visual Studio Remote Debugger can be used.
The Visual Studio Remote Debugger is a tool from Microsoft, which makes it possible to establish a connection (over ethernet) between the IDE on the host computer and the target system.
By using the tool, the builder result is automatically deployed to the target and executed. It also allows debugging the application using the IDE.
To download the tool, visit visualstudio.microsoft.com
Installation
After downloading, run the VS_RemoteTools.exe installer and follow the setup instructions to install the tool.
Make sure that the latest TQ EAPI is installed on the target: How to install the EAPI
Target Configuration
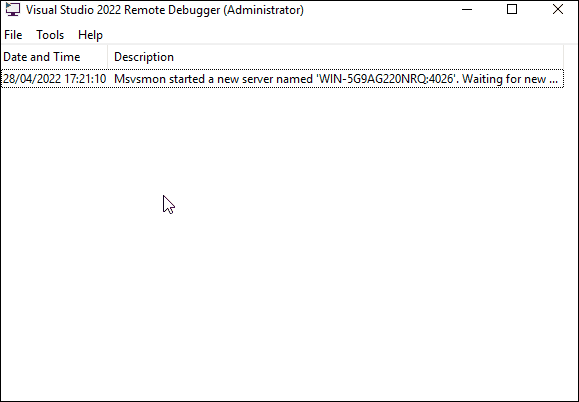
After installation, the Remote Debugger can be started from the Windows Start menu.
At the first startup, the tool must be configured for the current network.
For ease of use, the mode can be used without authentication.
Important
The following setting makes the system accessible on the network even without authentication.
This is not secure and is only recommended in a local test-network.
Setup Remote Debugger on Host (IDE)
In order to be able to debug the program via the IDE, we have to establish a connection with our target in the IDE.
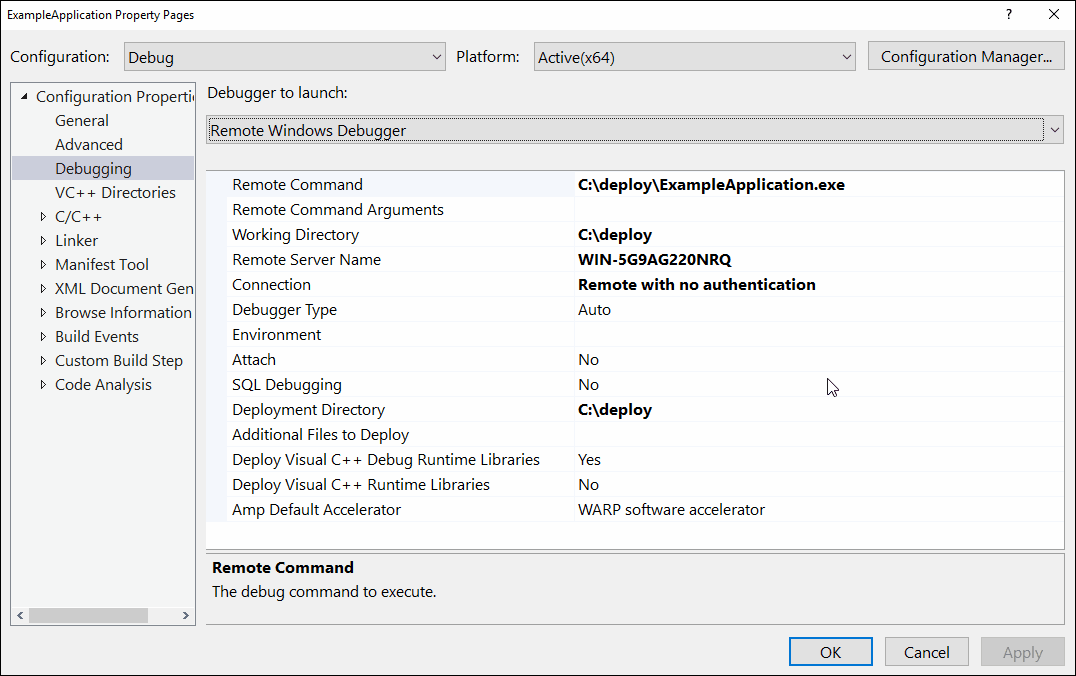
1. Open the project properties under Project → ExampleApplication Properties
2. Go to the debugging entry and change the “Debugger to launch” to “Remote Windows Debugger”
3. Adjust the entries to fit your remote system. We use the following values in this example:
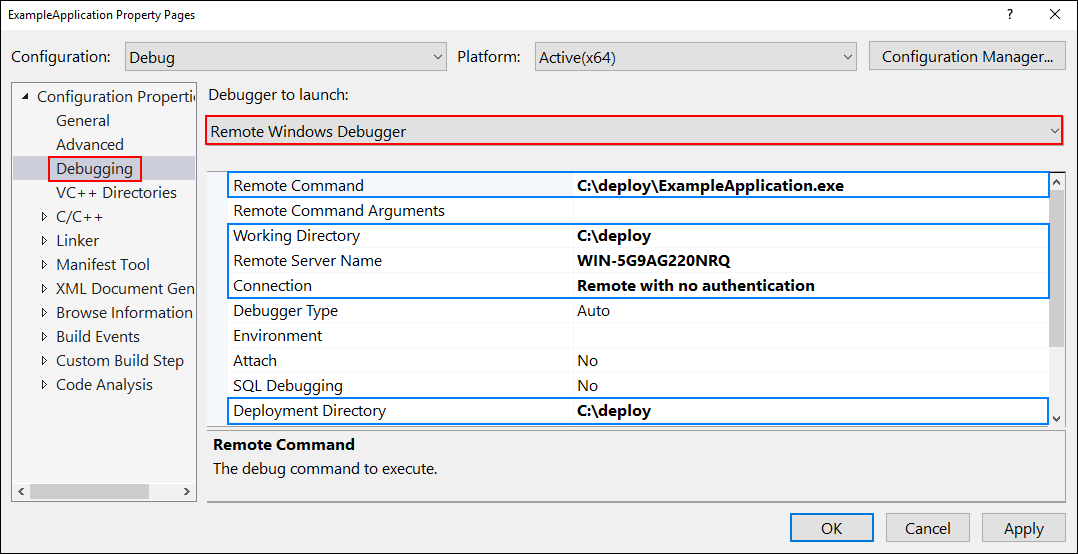
| Remote Command | C:\deploy\ExampleApplication.exe |
|---|---|
| Working Directiry | C:\deploy |
| Remote Server Name | can be found in Remote Debugger Tool on Target |
| Connection | Remote with no authentication |
| Deployment Directory | C:\deploy |
4. Go to the Configuration Manager and check the Deploy box to automatically deploy the application to the target.
5. after closing the window with the OK button the application can be started on the target. For this the button  in the IDE must be pressed.
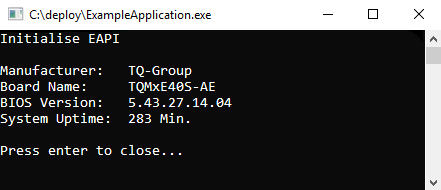
Then the console application should start on the target and output module informations: