Setup Eclipse IDE for STKa8MPxL
Prerequisites
- BSP built according to quickstart guide
- Built Yocto SDK based on the current RootFS configuration, installed on the development host. See Build Yocto SDK how to build it.
This guide was tested with the following software versions
- Ubuntu 22.04.2
- Eclipse Embed 2022.0 and Eclipse Embed 2021.6
- Yocto SDK based on hardknott.TQMa8.BSP.SW.0086
Linux host system dependencies
- build-essentials (already used for building the BSP)
sudo apt install build-essentials
Build and install yocto SDK
Build SDK
The Yocto SDK can be built (similar to the standard BSP) in Yocto with Bitbake.
The procedure is the same as for the normal image build, but you use the following command to build the BSP:
bitbake -c populate_sdk <IMAGE_NAME>
After building the SDK, the required .sh script is located in the build directory under: \tmp\deploy\sdk
A more detailed description can be found here.
SDK installation on the host system
To install the SDK, the script must be copied to any location on the host system and executed afterwards:
./toolchains.sh
For the installation, the default path specified in the script under /opt/… can be used.
Important
After successfull installation, the script outputs the following message:
SDK has been successfully set up and is ready to be used.
Each time you wish to use the SDK in a new shell session, you need to source the environment setup script e.g.
 $ . /opt/dumpling-wayland-nxp/3.3.6/environment-setup-cortexa53-crypto-tq-linux
The command mentioned after the $ sign is important for using the IDE with the SDK, so it should be saved for further use.
Install Eclipse IDE
We are going to demonstrate the method without the installer.
1. Download the IDE from the official website:
https://www.eclipse.org/downloads/
Important
In order to build applications with the Yocto SDK, the Eclipse Embedded version is required. Other versions may cause problems.
2. Extract the downloaded tar archive to any path with read and write permissions
Create startup script
Before starting Eclipse for the first time, a script has to be created which loads the required Yocto dependencies and then starts Eclipse. Eclipse must be started each time via the script.
1. navigate into the unpacked eclipse directory and create a script file:
cd eclipse #go into the eclipse folder
nano start_eclipse_yocto.sh #create the startup script
2. in the active editor, enter the previously saved command and the program call of the IDE. Your start_eclipse_yocto.sh script should look like this:
- start_eclipse_yocto.sh
. /opt/dumpling-wayland-nxp/3.3.6/environment-setup-cortexa53-crypto-tq-linux #previously copied command (the dot at tge beginning is necessary)
./eclipse #program call to start the eclipse IDE
3. save the script and make it executable with the following command:
chmod +x start_eclipse_yocto.sh
Set up project
Create new project
1. Start the IDE with the previeously created script.
When you open the program for the first time, the workspace directory is created or defined. This is where all your new projects end up.
2. Create new project under File → New → Project:
3. Set your projectname (1), project type (2) and toolchain (3):

4. Further settings do not have to be set. Follow the project setup with the “Next” button and create the project with the “Finish” button.
Configure project for AArch64
1. Open the project properties window:

2. Set the include directory for cross-compiling:
C/C++ Build → Settings → GNU Arm Cross C++ Compiler → Includes
Add the following Include Paths via the  button:
/opt/dumpling-wayland-nxp/3.3.6/sysroots/cortexa53-crypto-tq-linux/usr/include
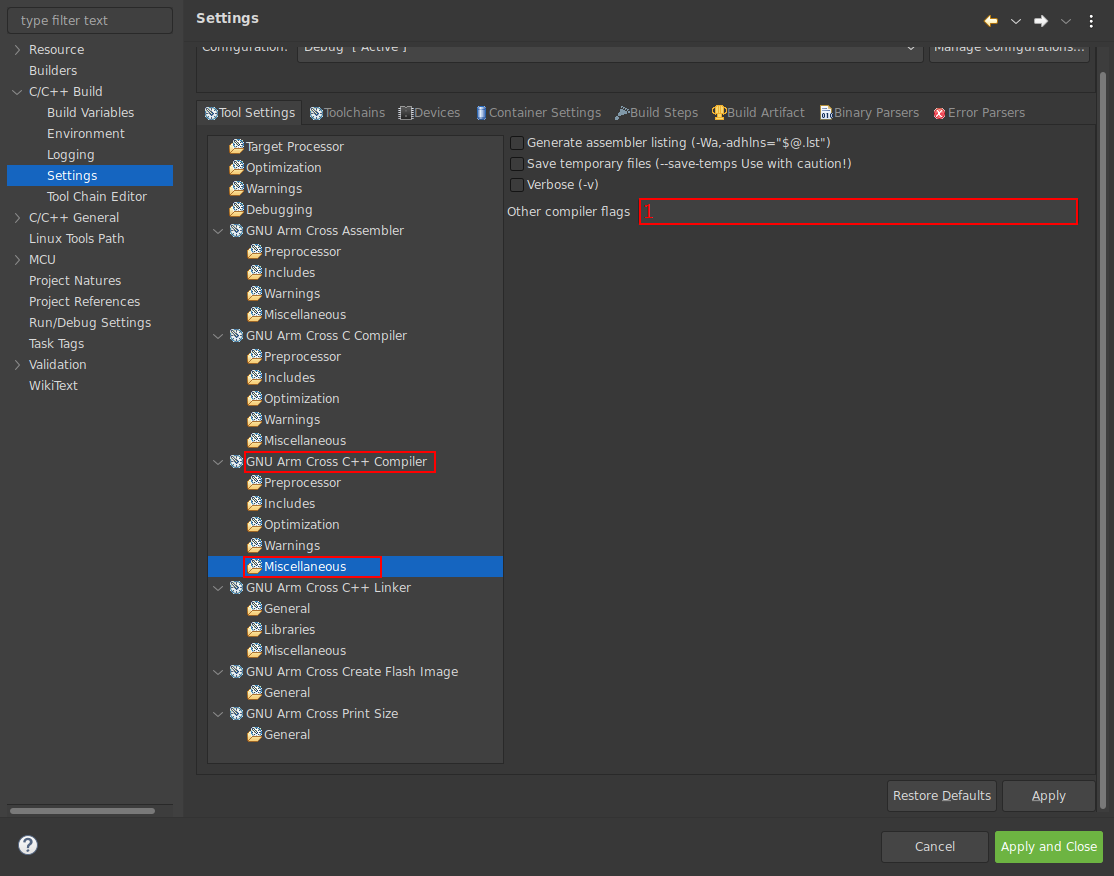
3. specify the compiler and linker flags (sysroot path):
C/C++ Build → Settings → GNU Arm Cross C++ Compiler → Miscellaneous
Enter the following compiler flags in the Other compiler flags (1) field (path must be adjusted!):
--sysroot=/opt/dumpling-wayland-nxp/3.3.6/sysroots/i686-tqsdk-linux/usr/bin/aarch64-tq-linux
4. The same path must be set for the linker:
C/C++ Build → Settings → GNU Arm Cross C++ Linker→ Miscellaneous
Enter the following compiler flag in the Other Linker flags (1) field (path must be adjusted!):
--sysroot=/opt/dumpling-wayland-nxp/3.3.6/sysroots/i686-tqsdk-linux/usr/bin/aarch64-tq-linux
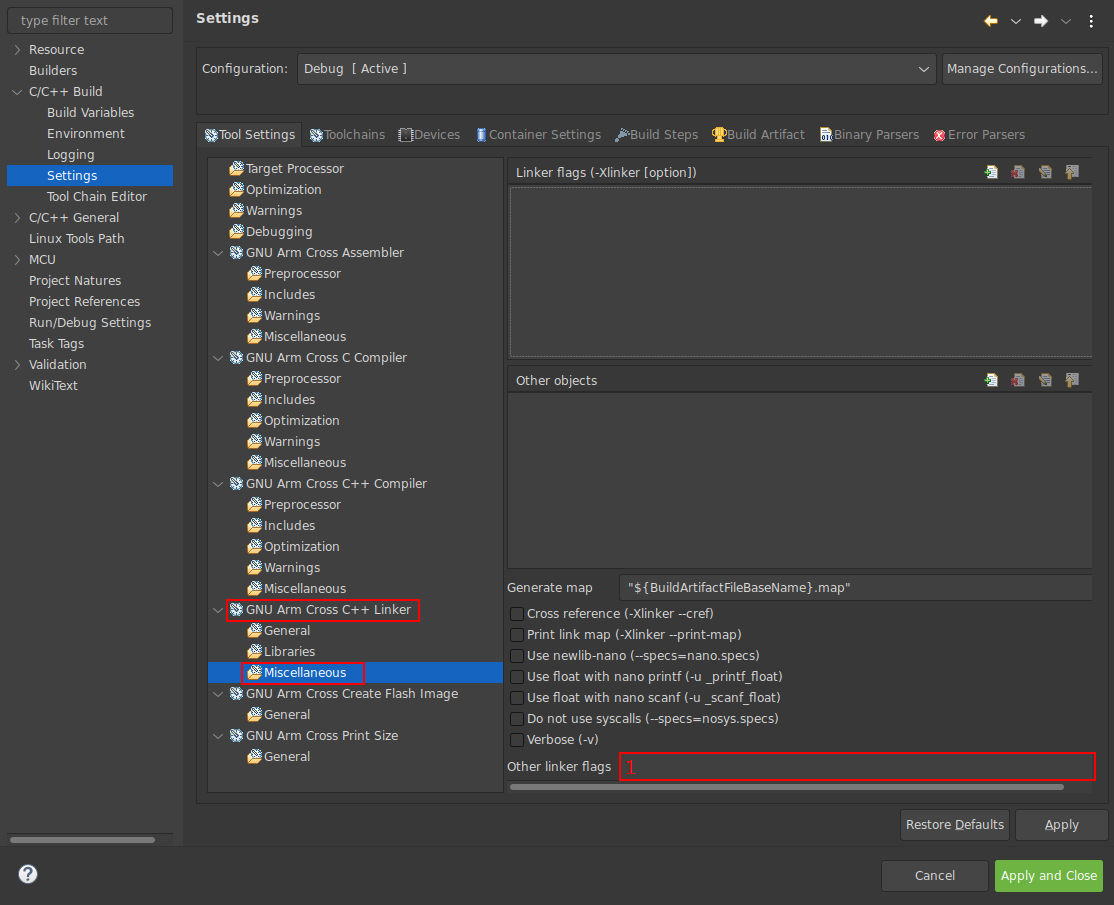
Important
In case there are already options in the Other left flags field, they have to be removed. Only the –sysroot option may be stored here for now.
5. Now the used toolchain must be configured:
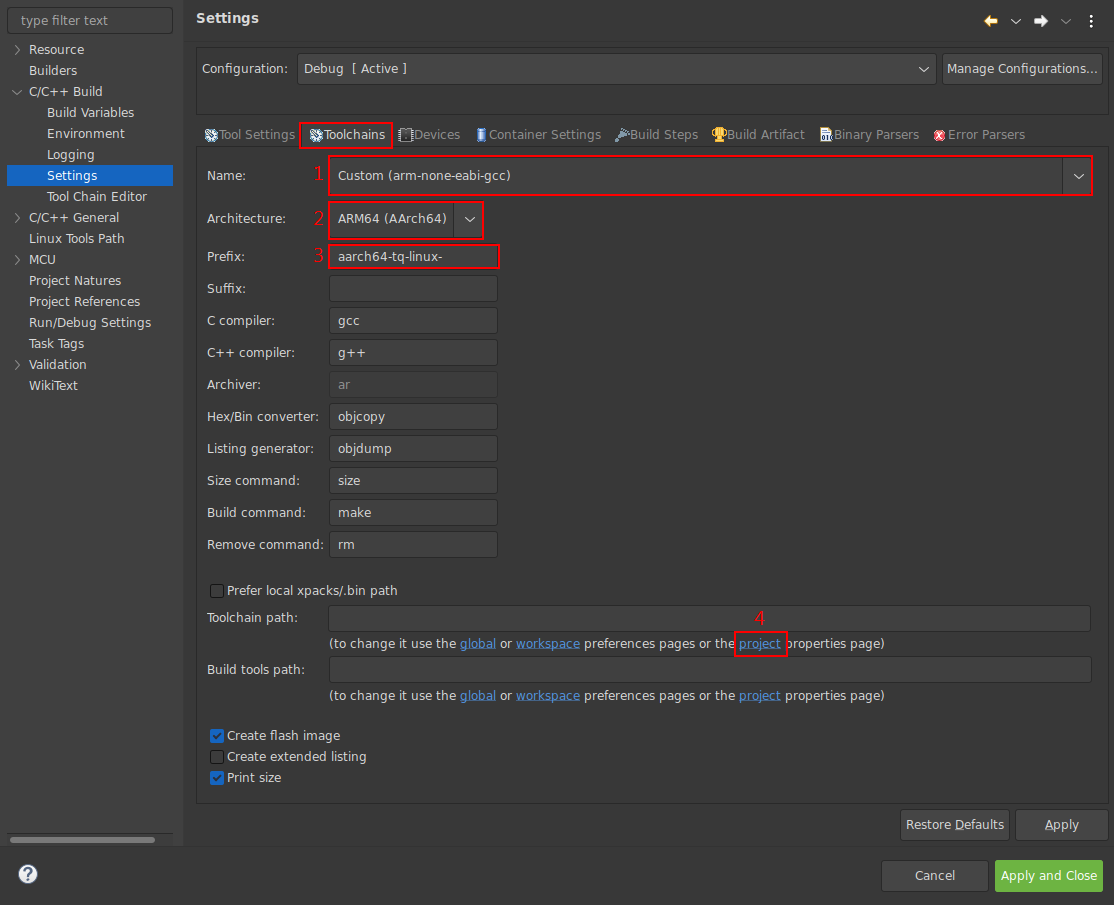
After switching to the Toolchains tab, the following values must be set:
1 → Custom (arm-none-eabi-gcc)
2 → ARM64 (AArch64)
3 → aarch64-tq-linux-
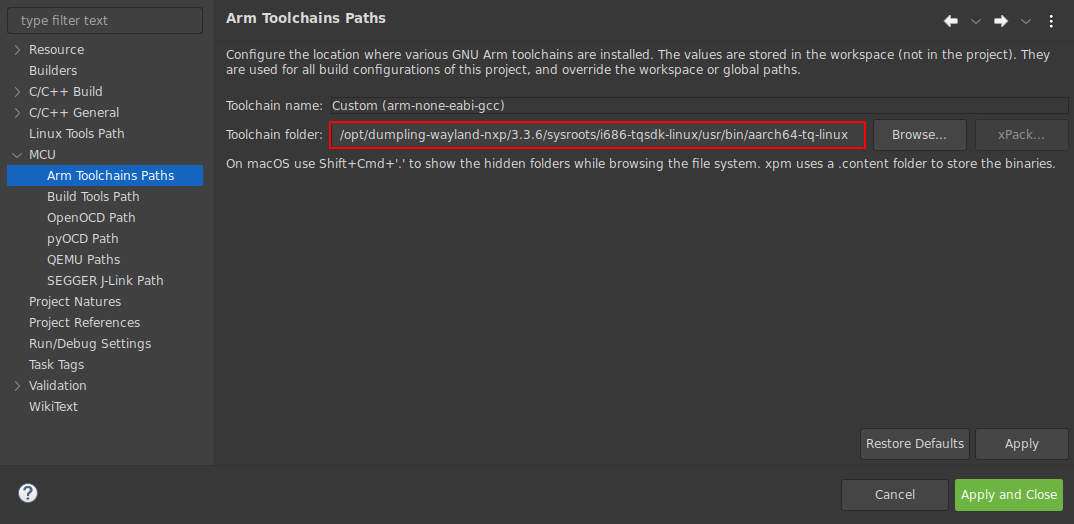
To set the toolchain path, click on the Project link button (4) and enter the path to the toolchain:
/opt/dumpling-wayland-nxp/3.3.6/sysroots/i686-tqsdk-linux/usr/bin/aarch64-tq-linux
Finally after entering all the parameters, you can close all windows with “Apply and Close” and the project is completely set up for cross-compiling.