Embedded module TQMaRZG2x - YOCTO Linux BSP documentation
Setup Eclipse IDE for STKaRZG2
Prerequisites
- BSP built according to quickstart guide
- Built Yocto SDK based on the current RootFS configuration, installed on the development host. See Build Yocto SDK how to build it.
- Configured SSH login on target. See setup ssh connection
- Configured Network connection to the development host
Additional Yocto Packages
The following has to be added to the local.conf file in the build directory or to your custom image recipe:
EXTRA_IMAGE_FEATURES = " eclipse-debug"
IMAGE_INSTALL_append = " openssh-sftp-server"
Set Password User Root (optional)
This guide uses a password based authentication for the ssh target connection. The password can be setup with the passwd command on the target. The password can also be defined in the local.conf file or your custom image recipe. Below you will find a an example to add the password password to the user root.
INHERIT += "extrausers"
EXTRA_USERS_PARAMS = "usermod -P password  root;"
Setup Development Host
The Eclipse IDE requires the following packages installed on the development host:
- build-essential
- gdb
- gdb-multiarch
- git
- default-jre
On a Ubuntu based development host, they can be installed by the following commands:
sudo apt-get install build-essential gdb gdb-multiarch git default-jre
Download the Eclipse from the following link in this case Eclipse 2021-06:
https://www.eclipse.org/downloads/download.php?file=/technology/epp/downloads/release/2021-06/R/eclipse-cpp-2021-06-R-linux-gtk-x86_64.tar.gz
Afterwards extract the Eclipse tarball e.g. to your home directory, by default the folder is named eclipse.
cd ~
tar -xf ~/Downloads/eclipse-cpp-2021-06-R-linux-gtk-x86_64.tar.gz
Now the Eclipse IDE can be started from a terminal: e.g.
~/eclipse/eclipse
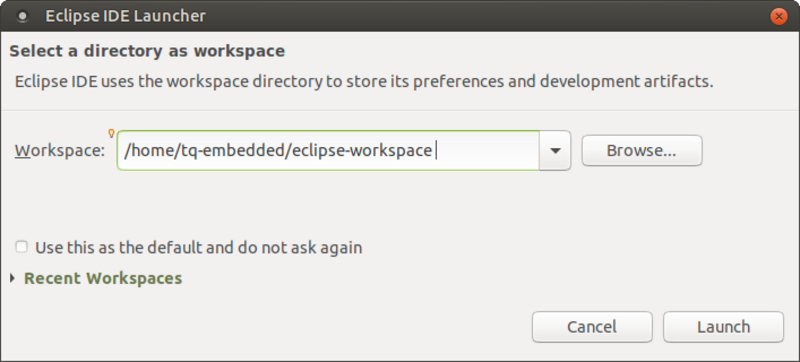
After starting Eclipse select a new workspace directory and click the Launch button.
Create a new Hello World Project
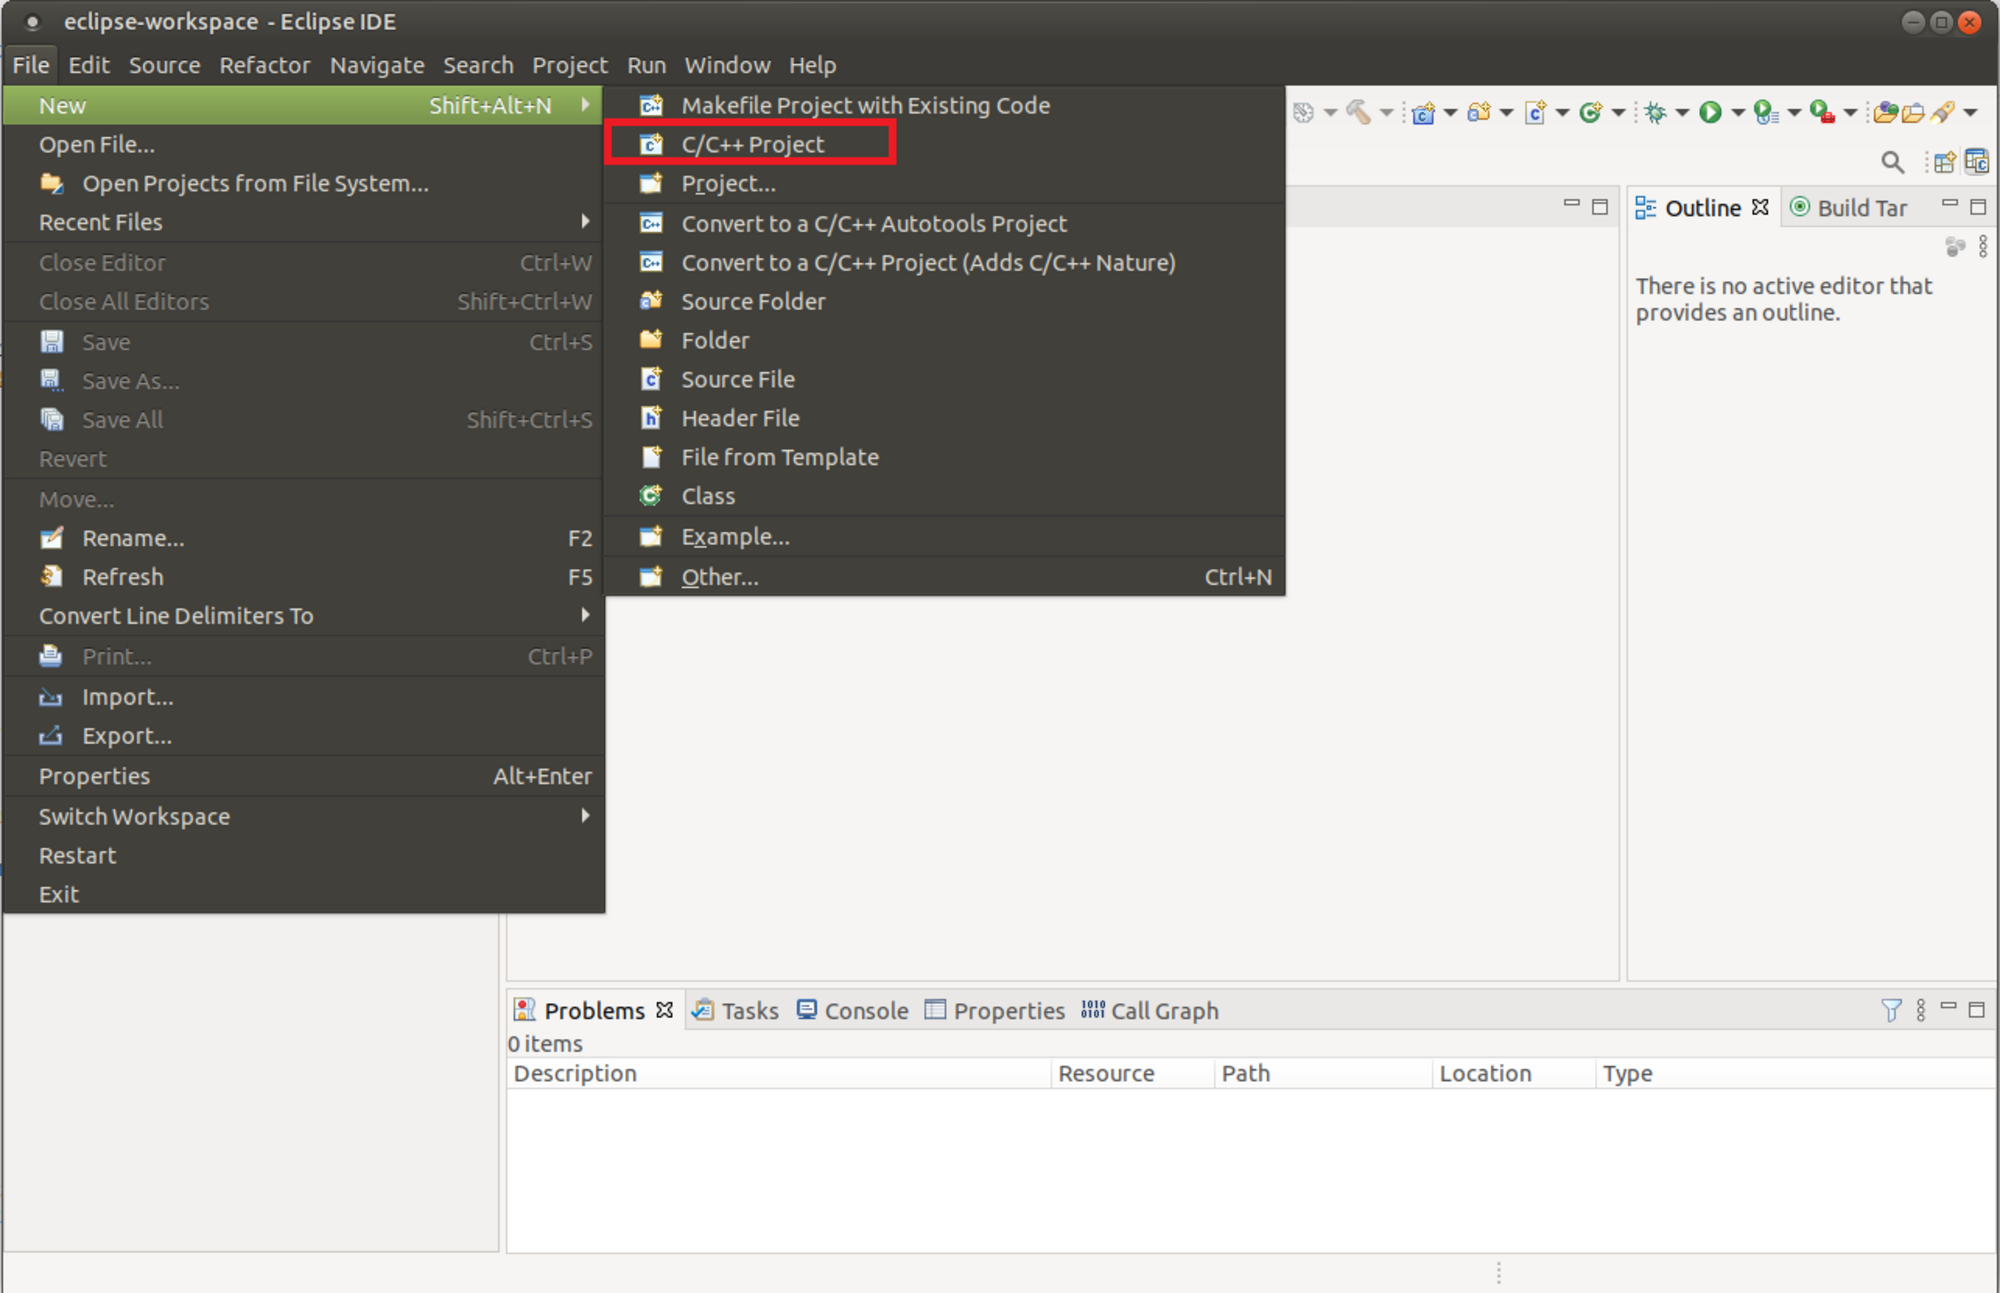
Select File → New → C/C++ Project
Select C Managed Build and click Next

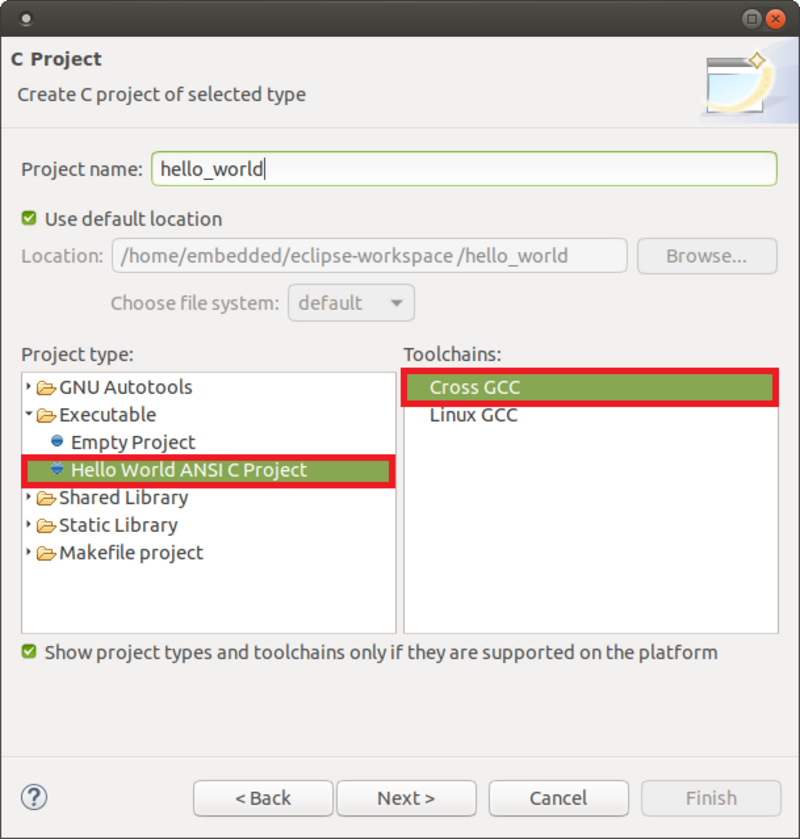
- Enter a name for the project in the Project name field
- Select Hello World ANSI C Project in the Project type field
- Select Cross GCC in the toolchain field
Click the Next Button.
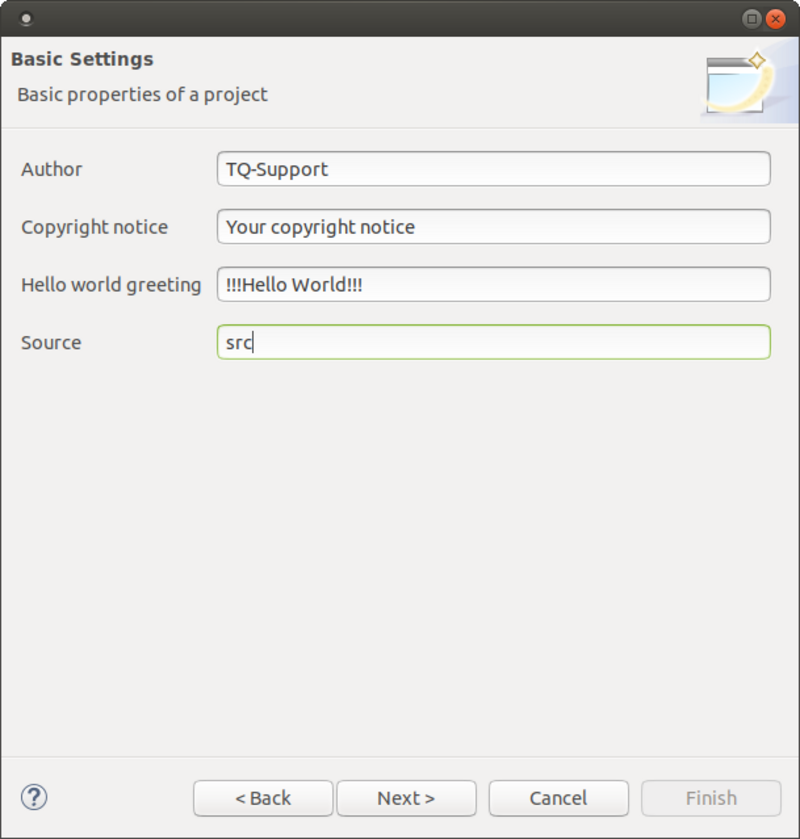
- Add the author name
- Check that the license field is correct
Click Next
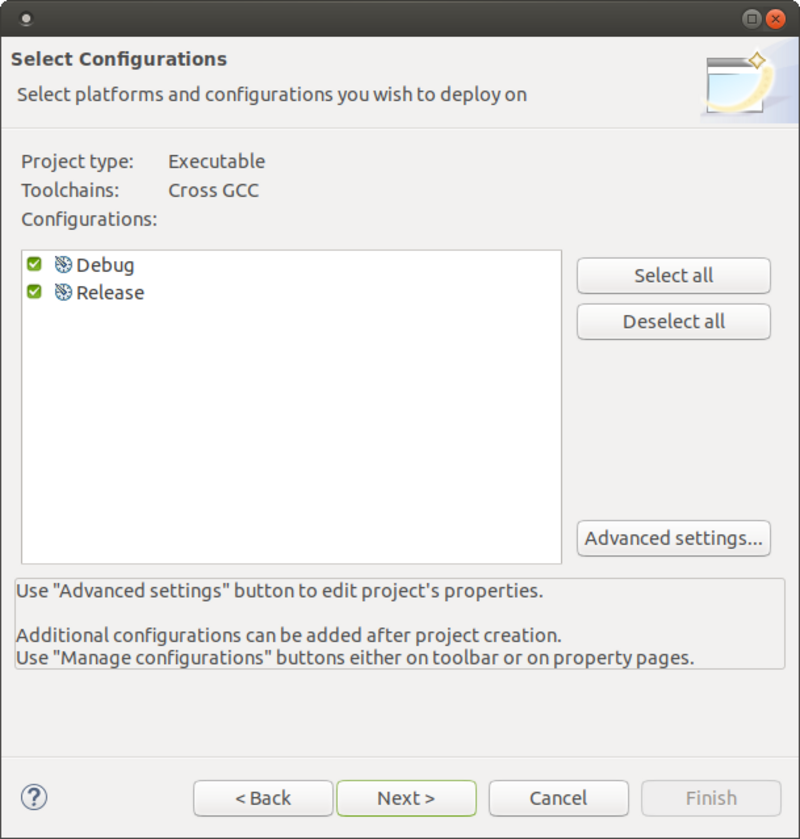
Accept the default settings for Debug and Release by clicking Next
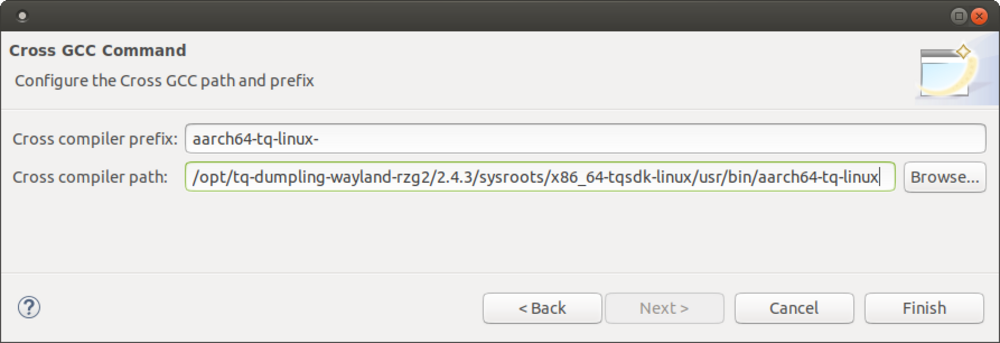
- aarch64-poky-linux-
- /opt/-linux/usr/bin/<sdk_sub_folder>SDK_SUB_FOLDER</label>
Finally click on Finish
Cross Compiler Configuration
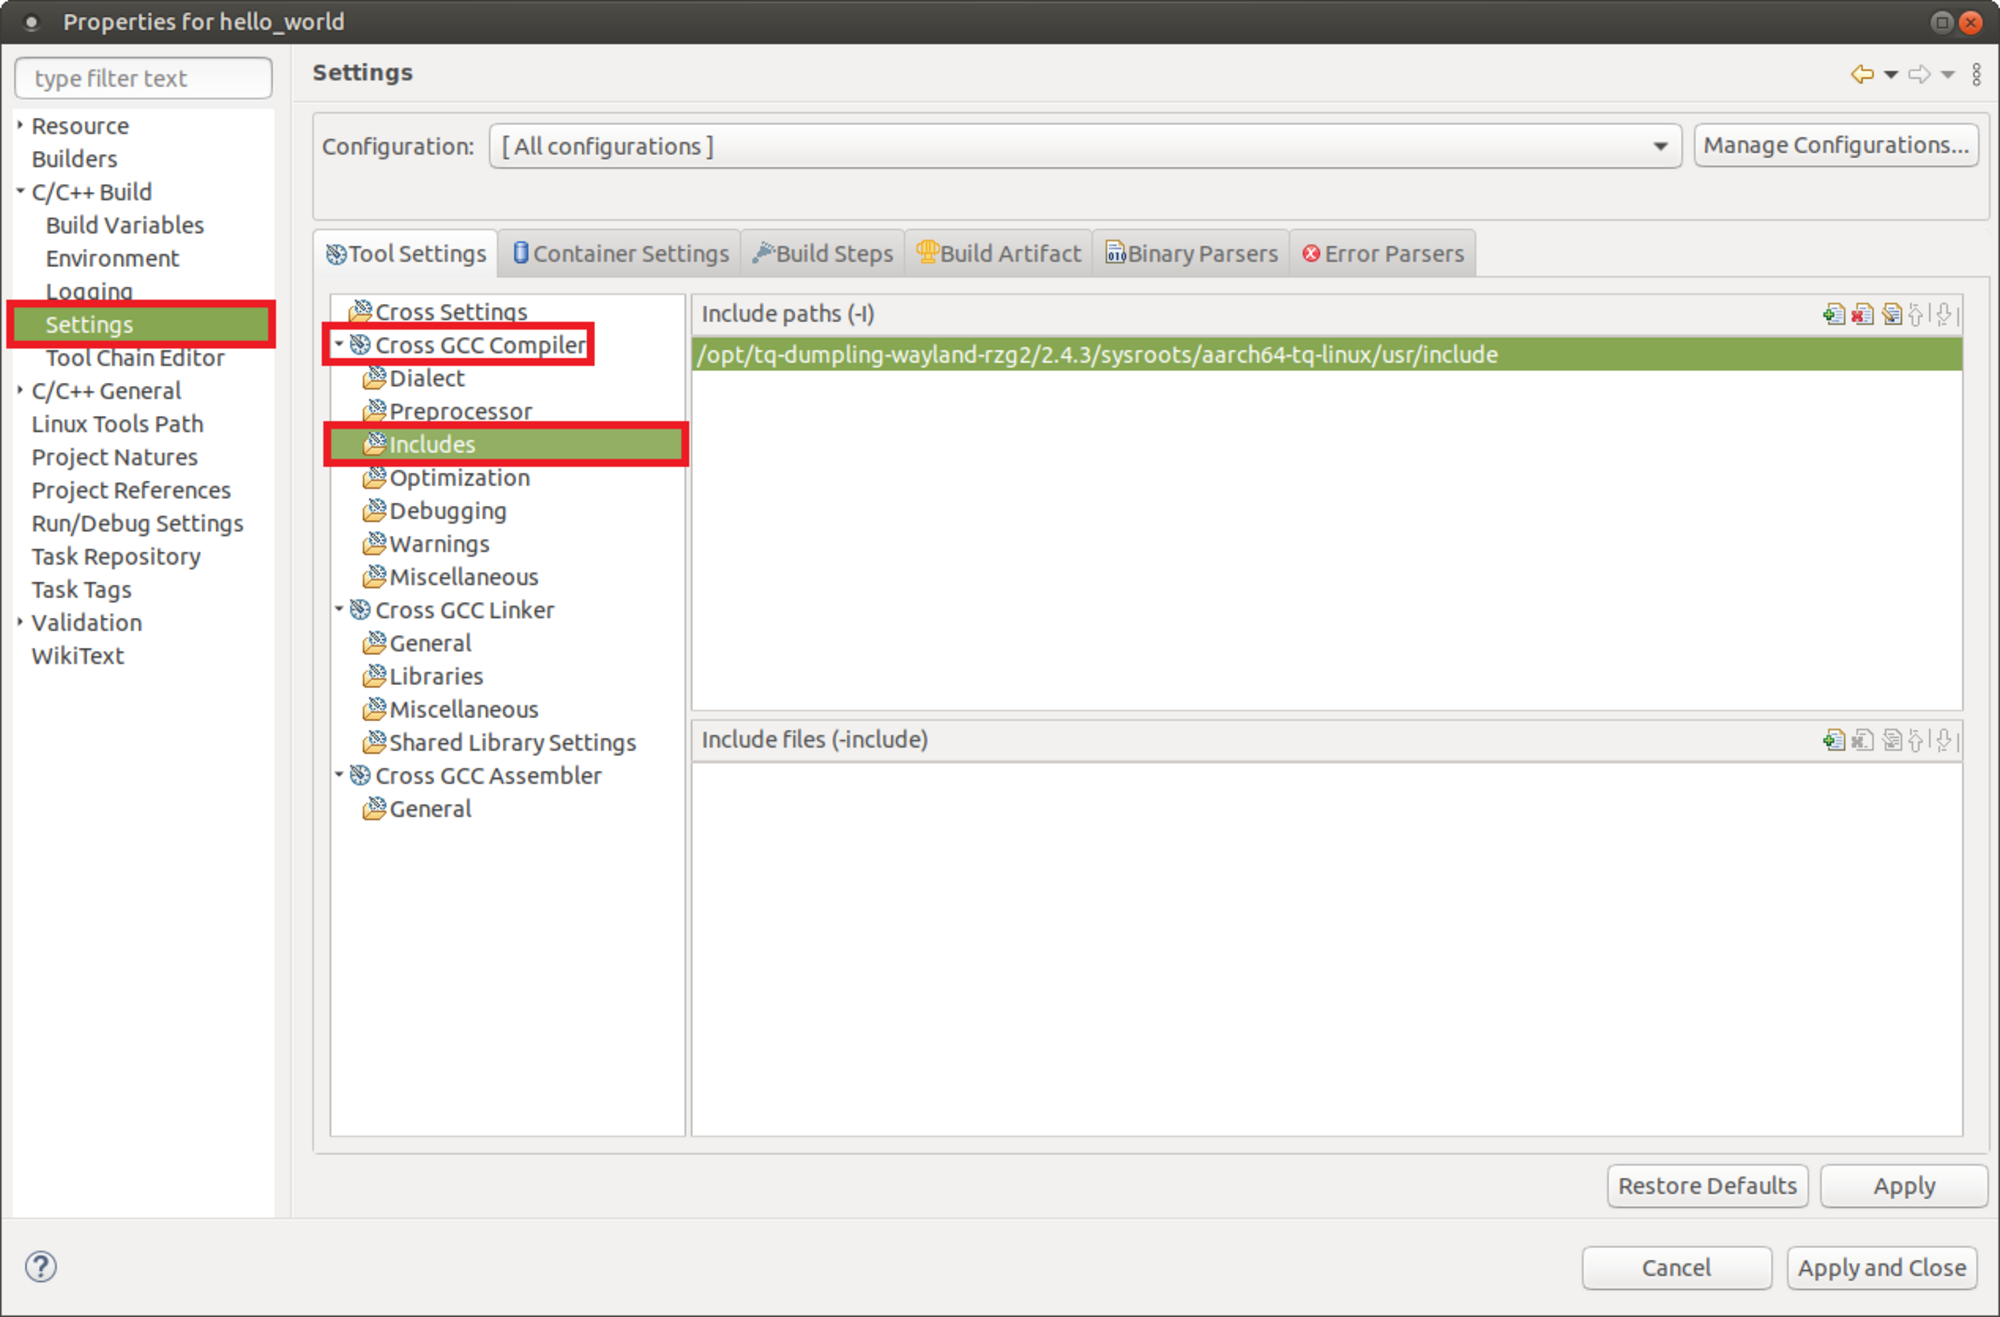
- Right click on the project and select Properties from the menu

- Select All configurations in the configuration field
- Select C/C++ Build → Settings → Cross GCC Compiler → Includes and enter the following path:
/opt/fsl-imx-wayland/5.4-zeus/sysroots/aarch64-poky-linux/usr/include
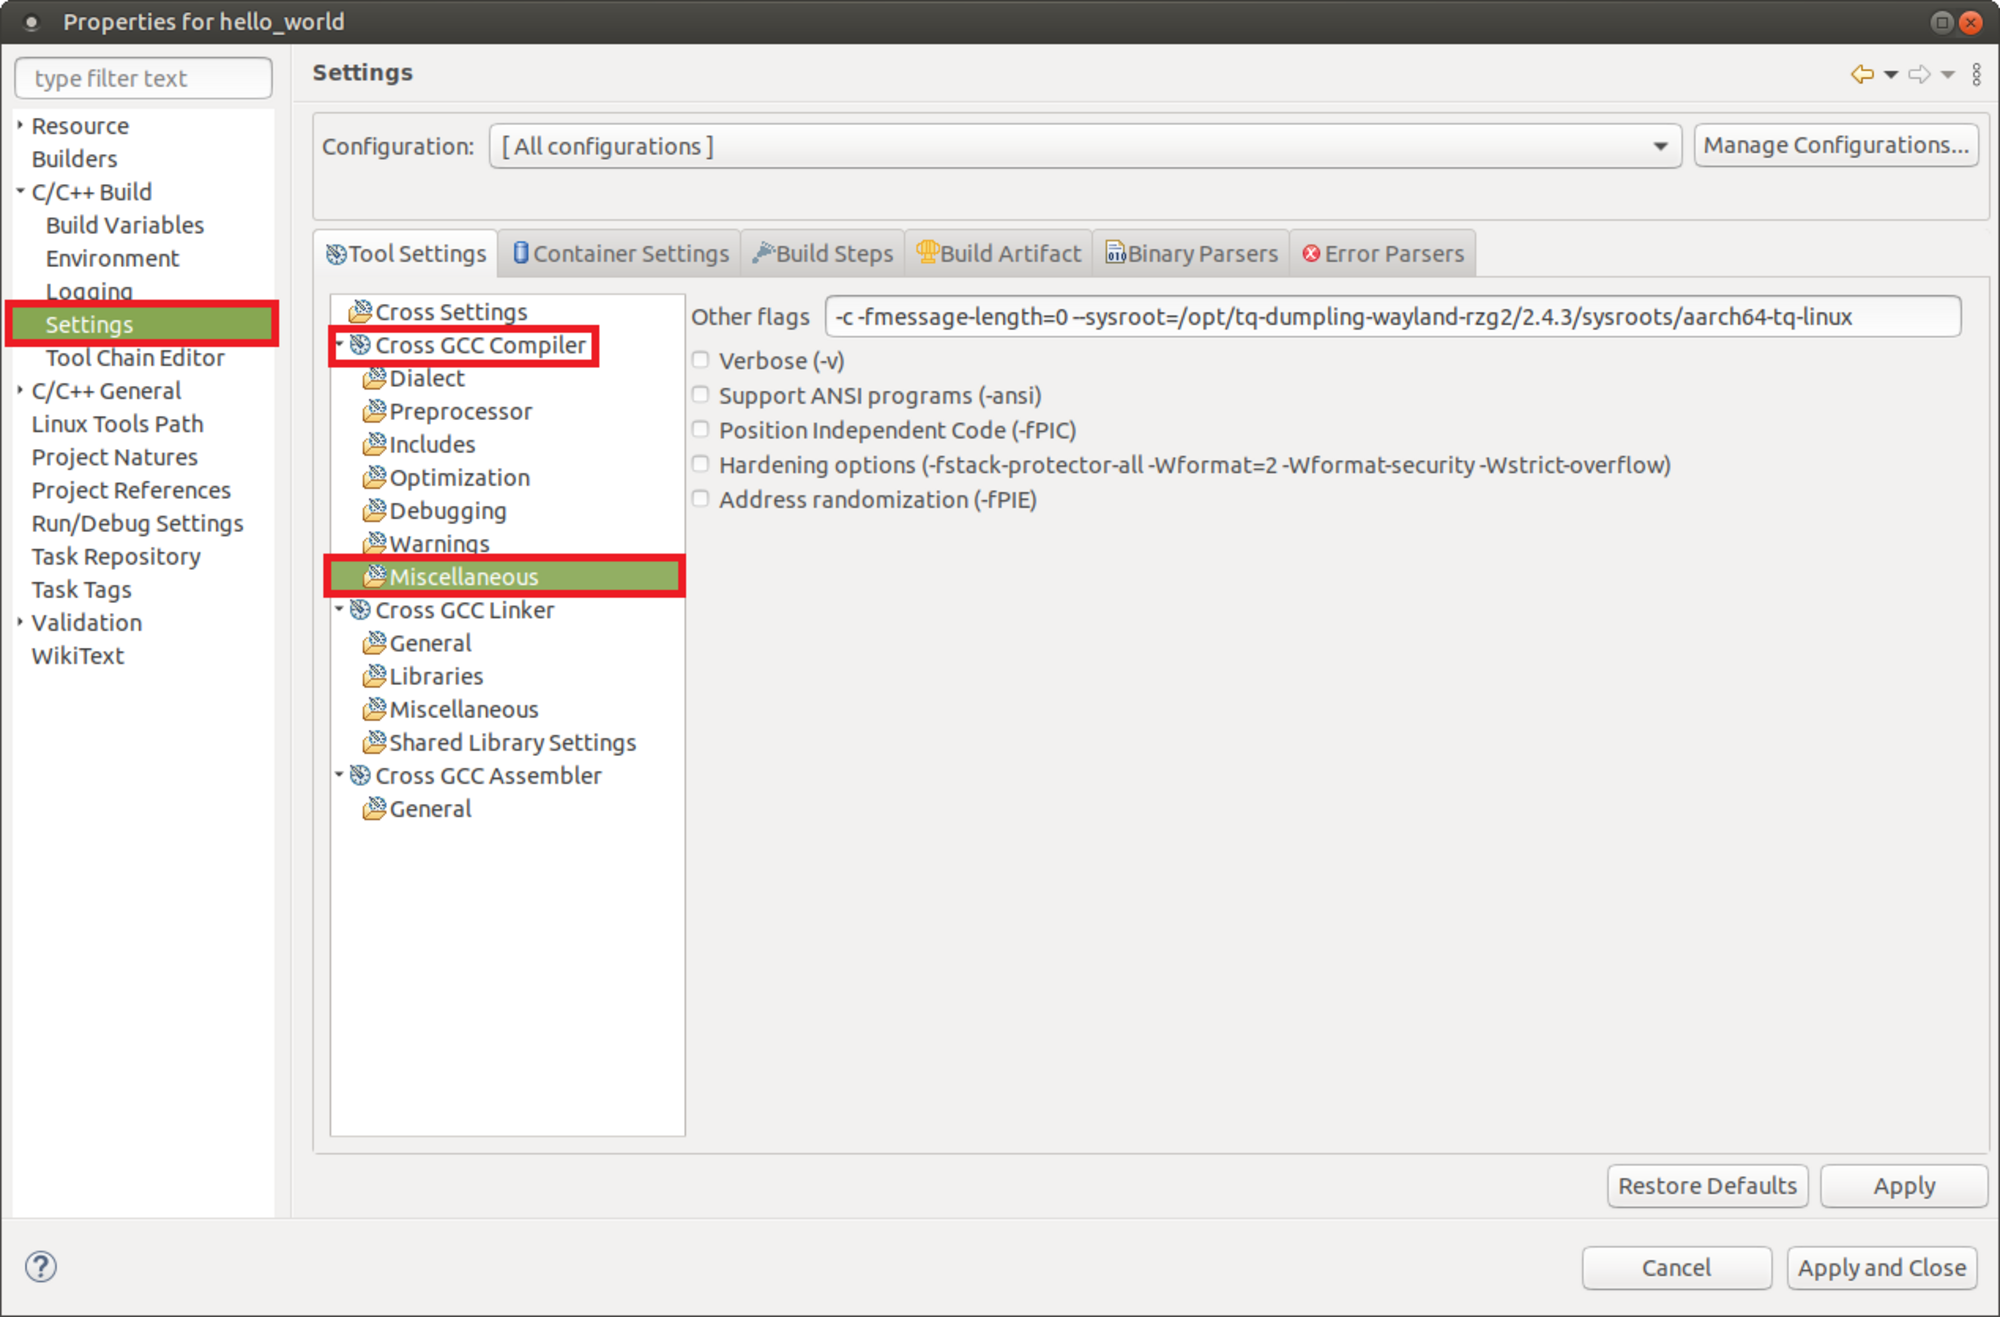
- Select C/C++ Build → Settings → Cross GCC Compiler → Miscellaneous and append the following in the Other flags field:
--sysroot=/opt/-linux
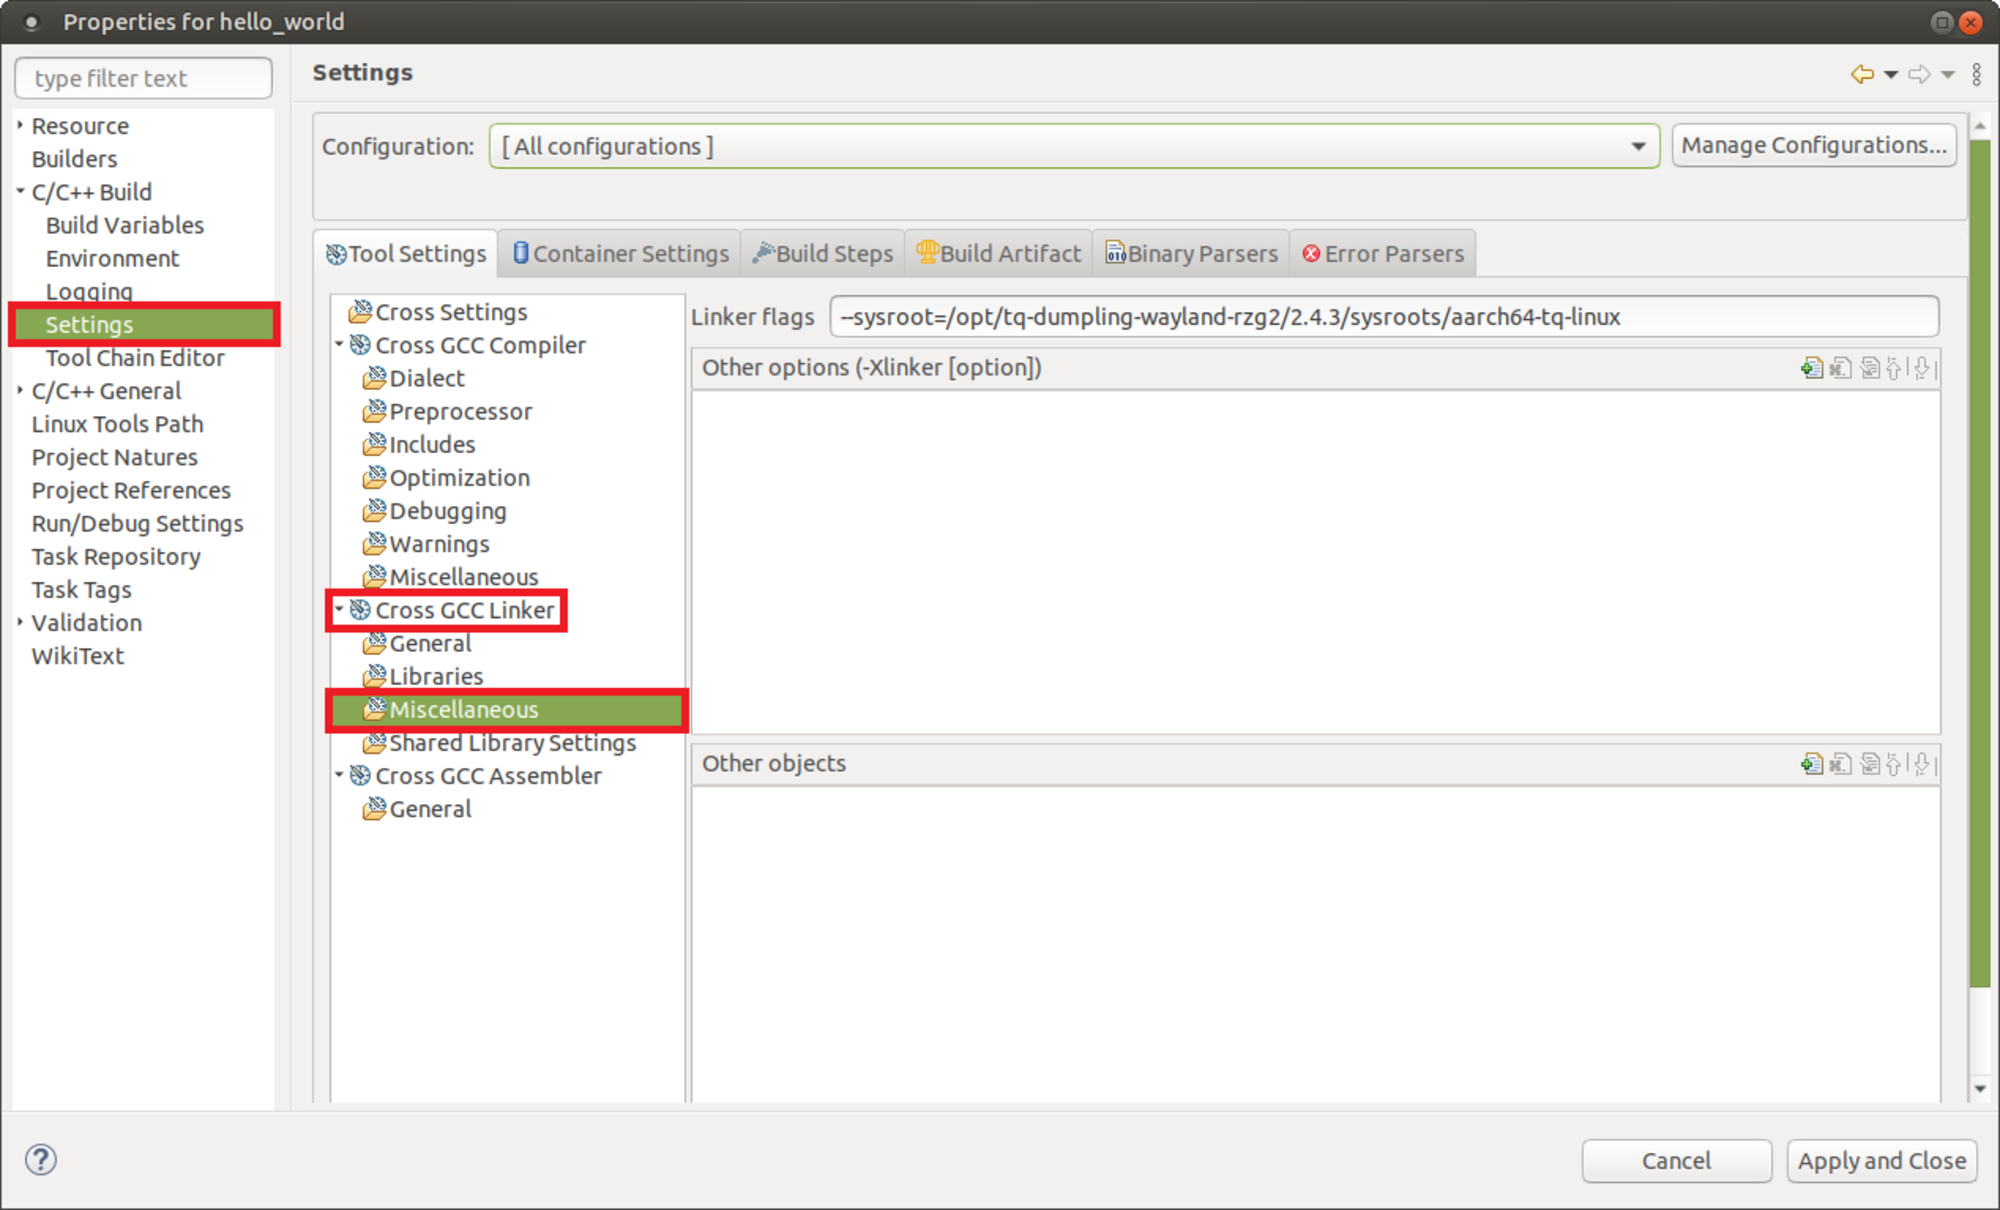
- Select C/C++ Build → Settings → Cross GCC Linker → Miscellaneous and add the following in the Linker flags field:
--sysroot=/opt/fsl-imx-wayland/-linux
Apply and Close finally to leave the Properties Menu.
Remote Debug Configuration
- Setup the SSH Connection Starterkit for further information see the section SSH Connection
- Setup the Network Connection on the Starterkit
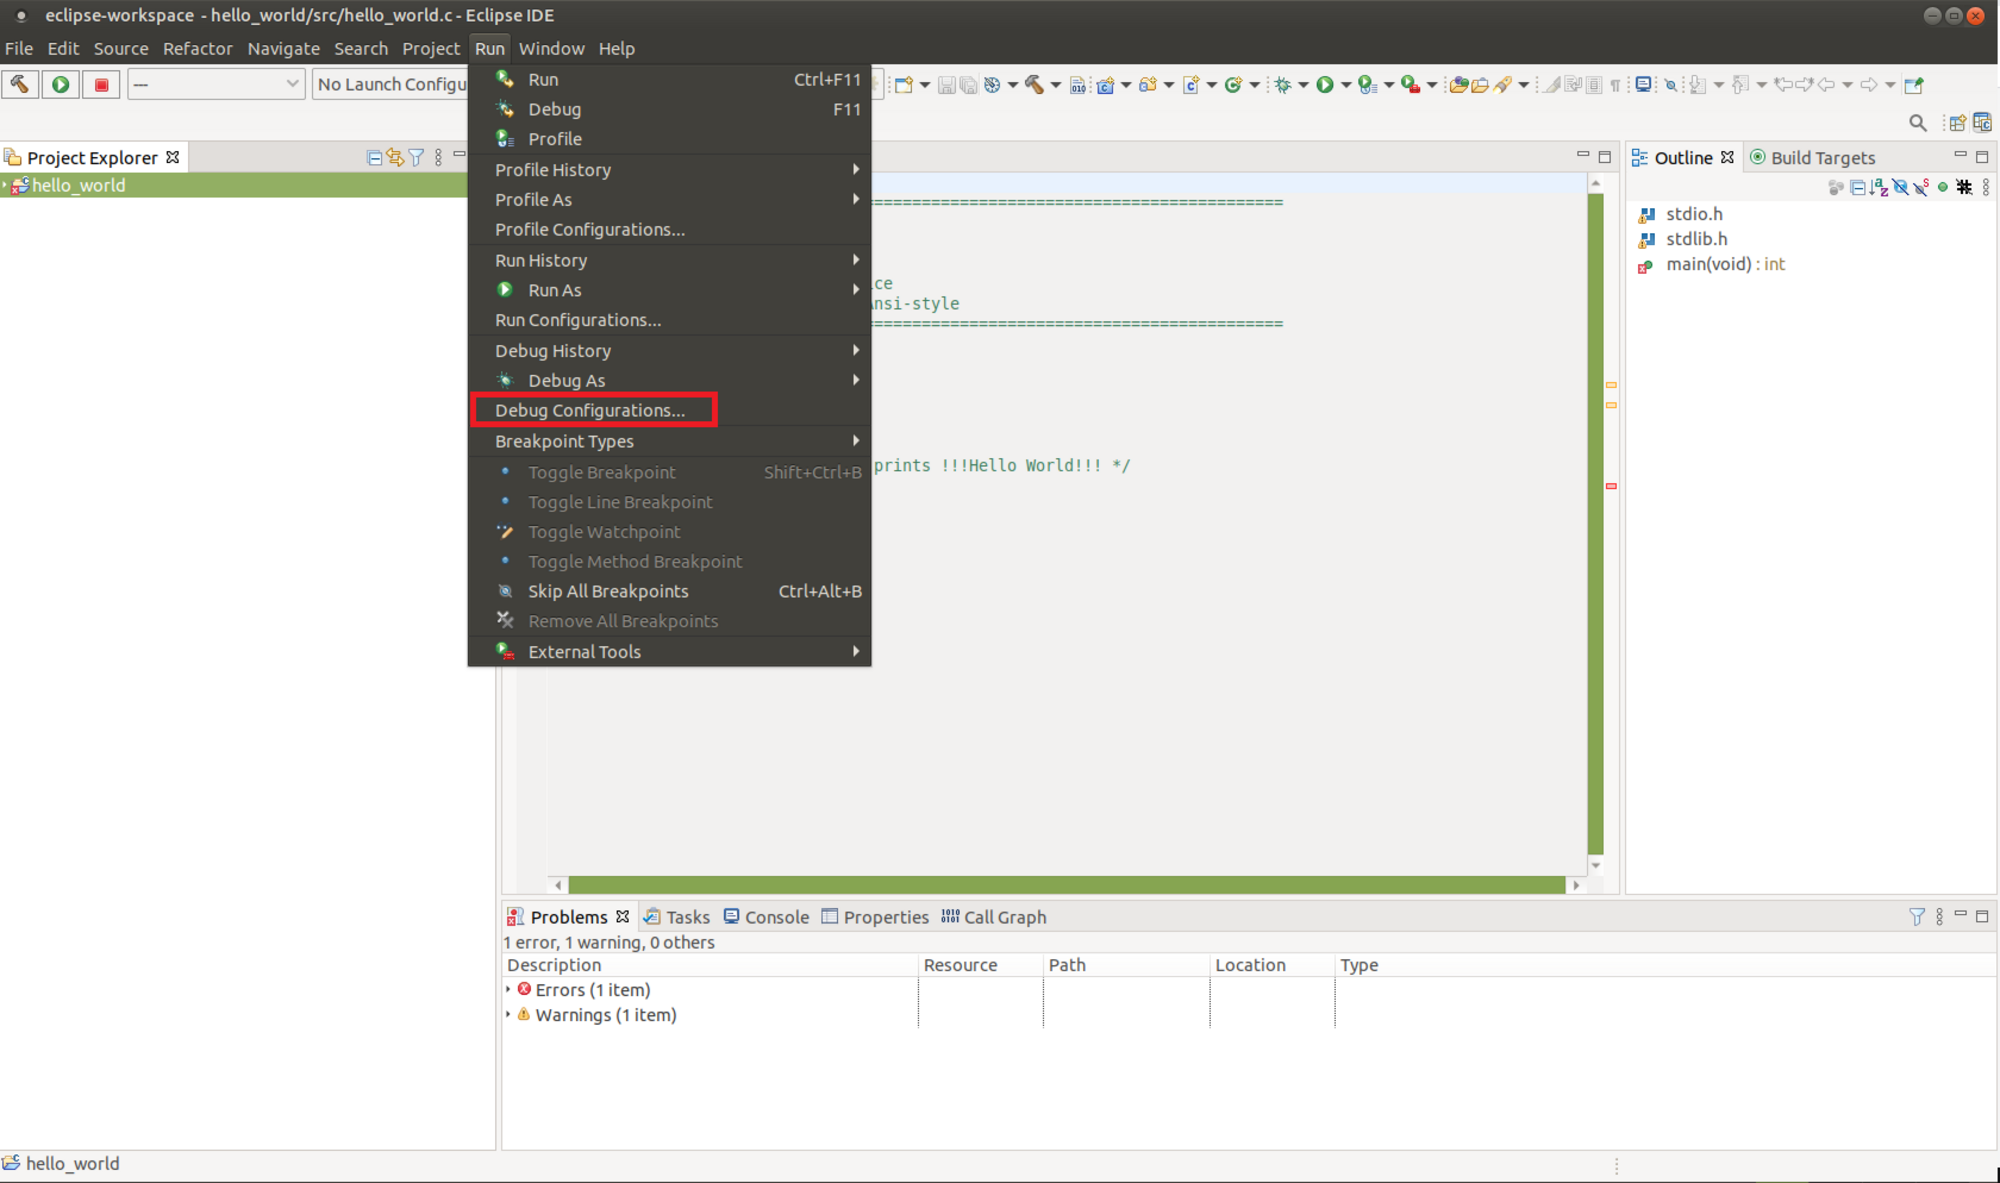
Select Run → Debug Configurations
Double Click C/C++ Remote Application and click on New to create a new connection to the target
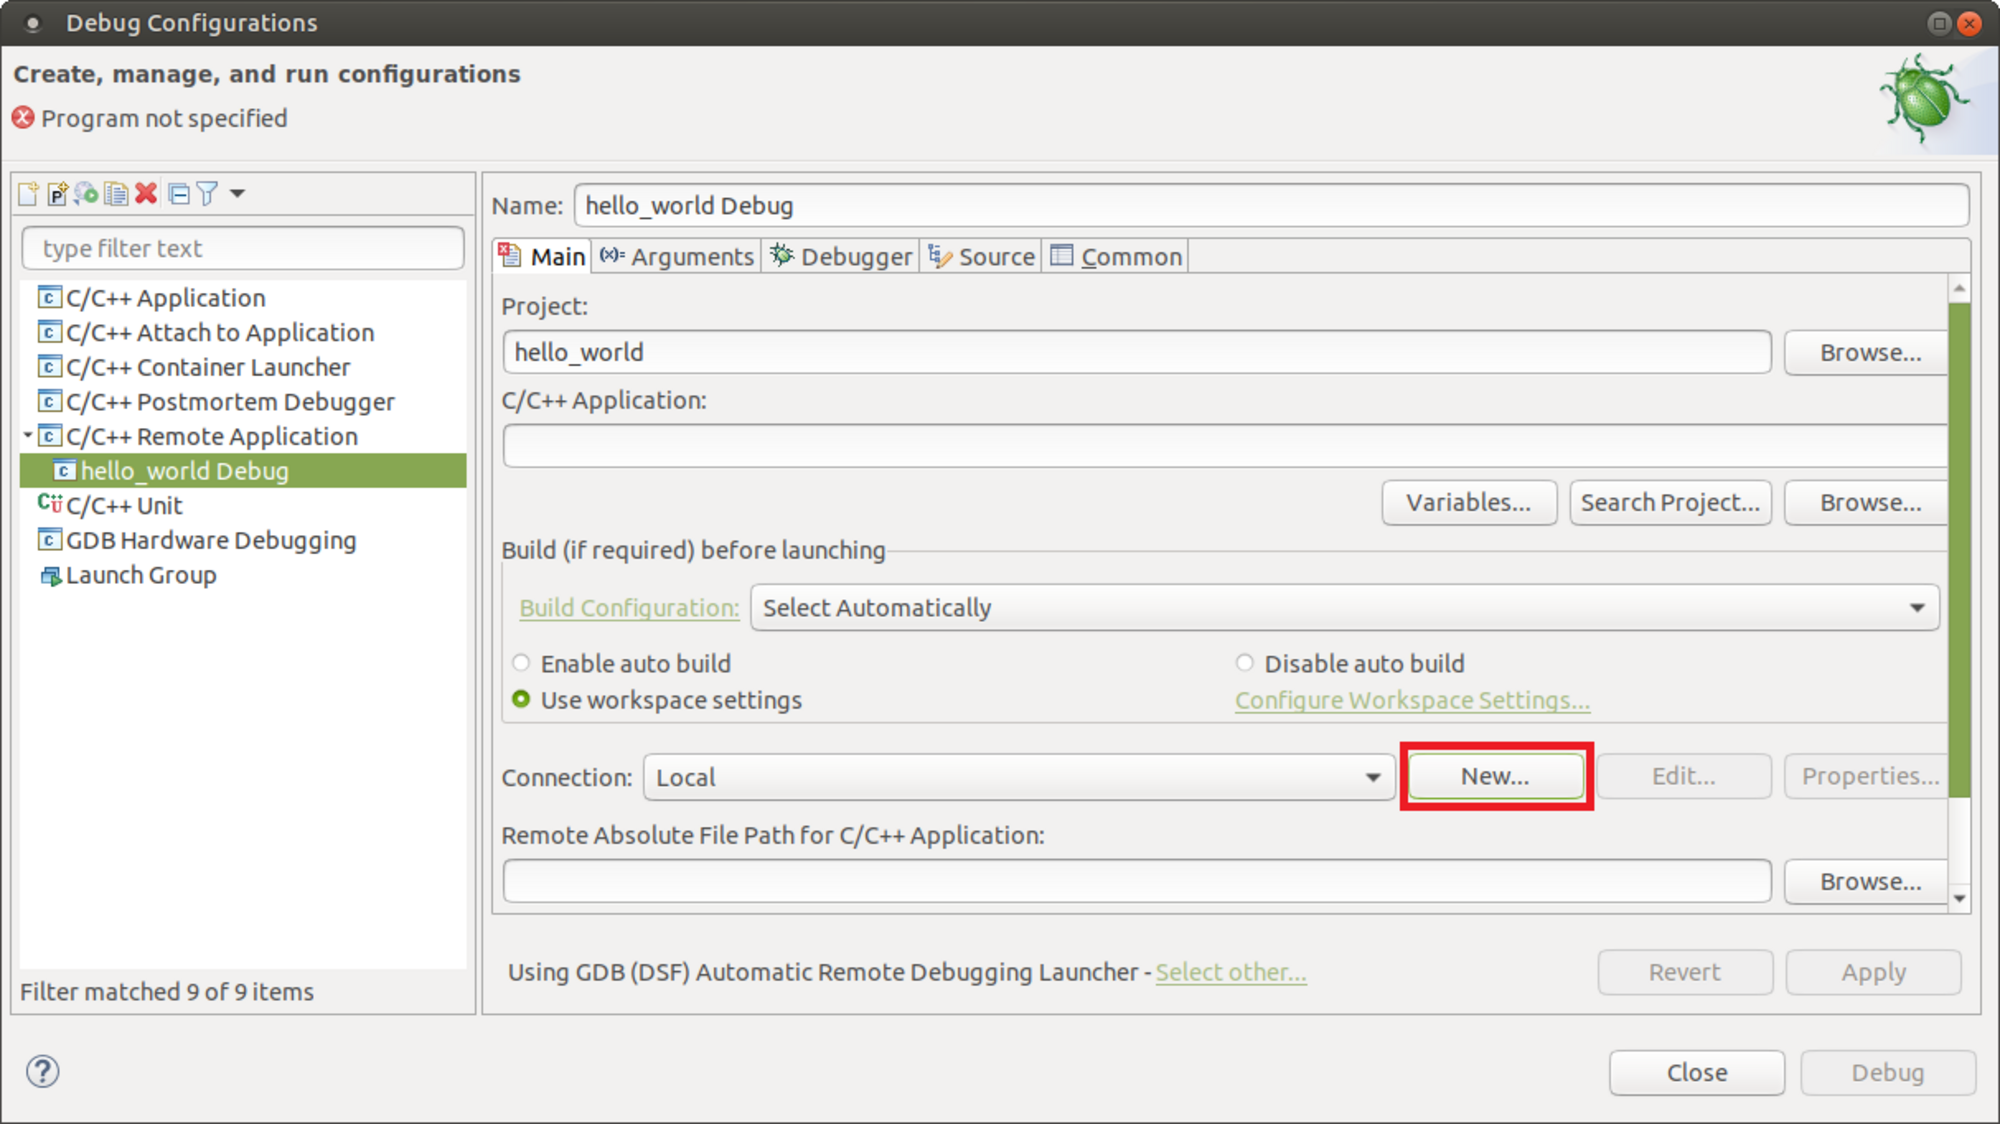
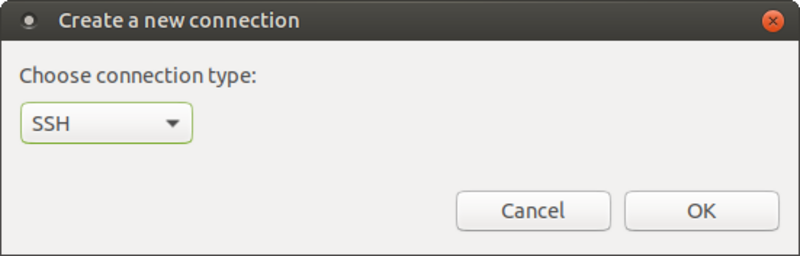
Select SSH in the drop down menu and click OK
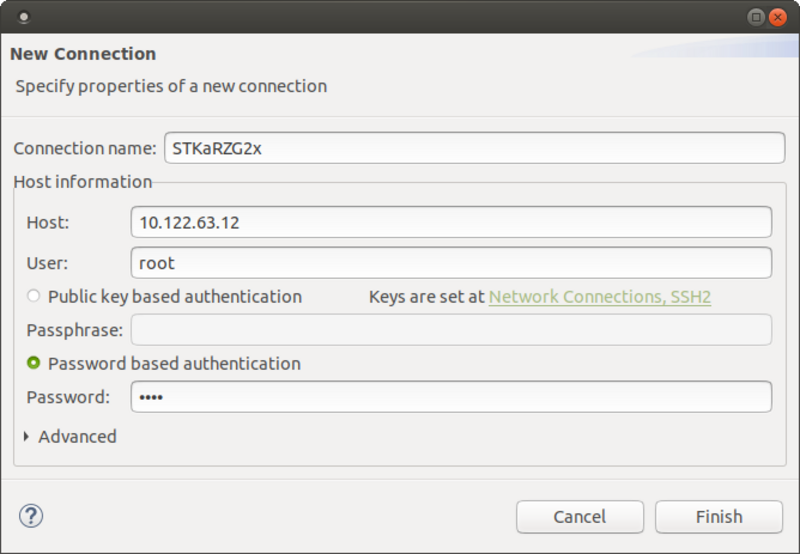
- Select a Connection name
e.g. STKaRZG2
- Enter the IP address of the Target
e.g. 10.122.63.12
- Enter the user name that is used to login on the target
e.g. root
- Select Password based authentication and enter the password for the user that is used to login on the target
e.g. root
Finally click on Finish
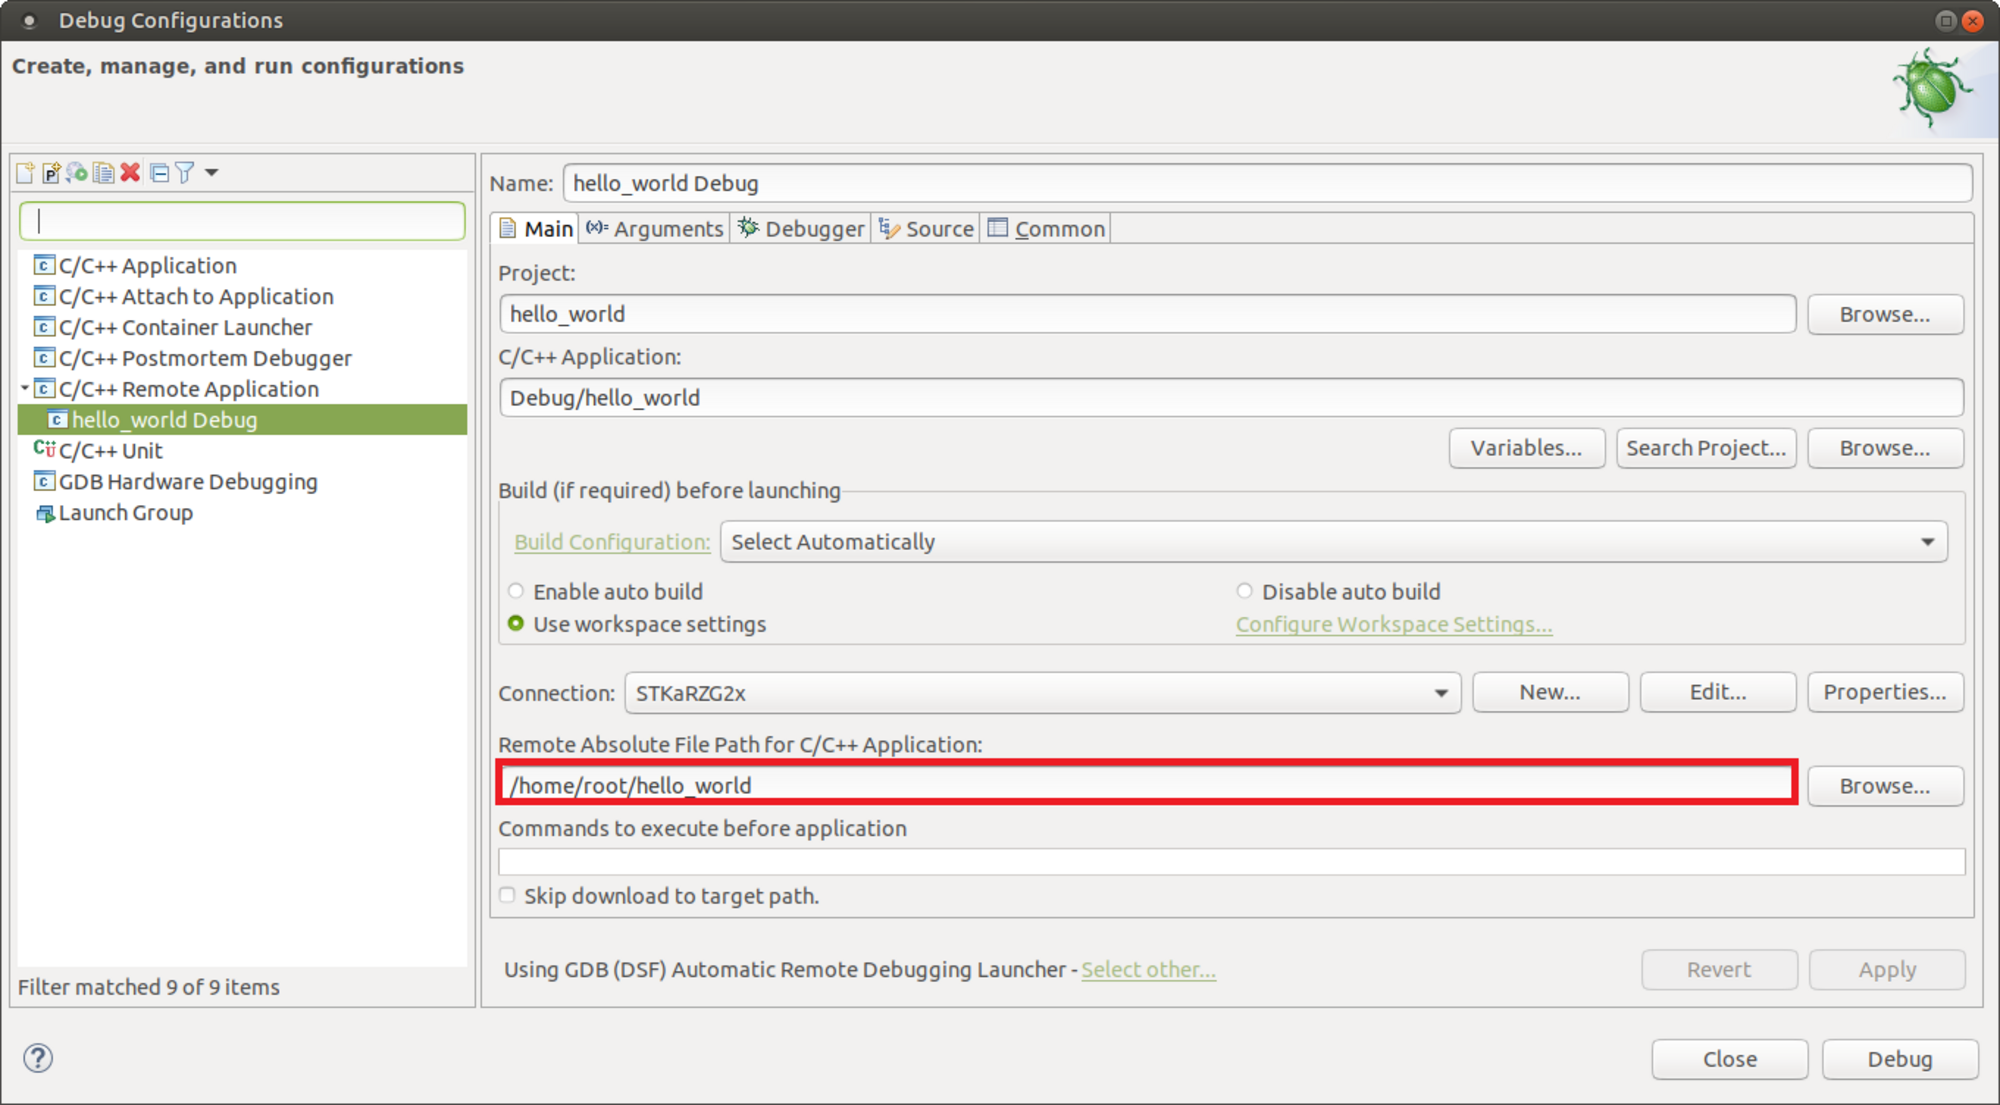
Enter the target application path in the Remote Absolute File Path for C/C++ Application field:
e.g. /home/root/hello_world. It is also possible to select the path on the target by clicking the Browse button.
Switch to the Debugger tab and enter aarch64-poky-linux-gdb in the GDB debugger field.
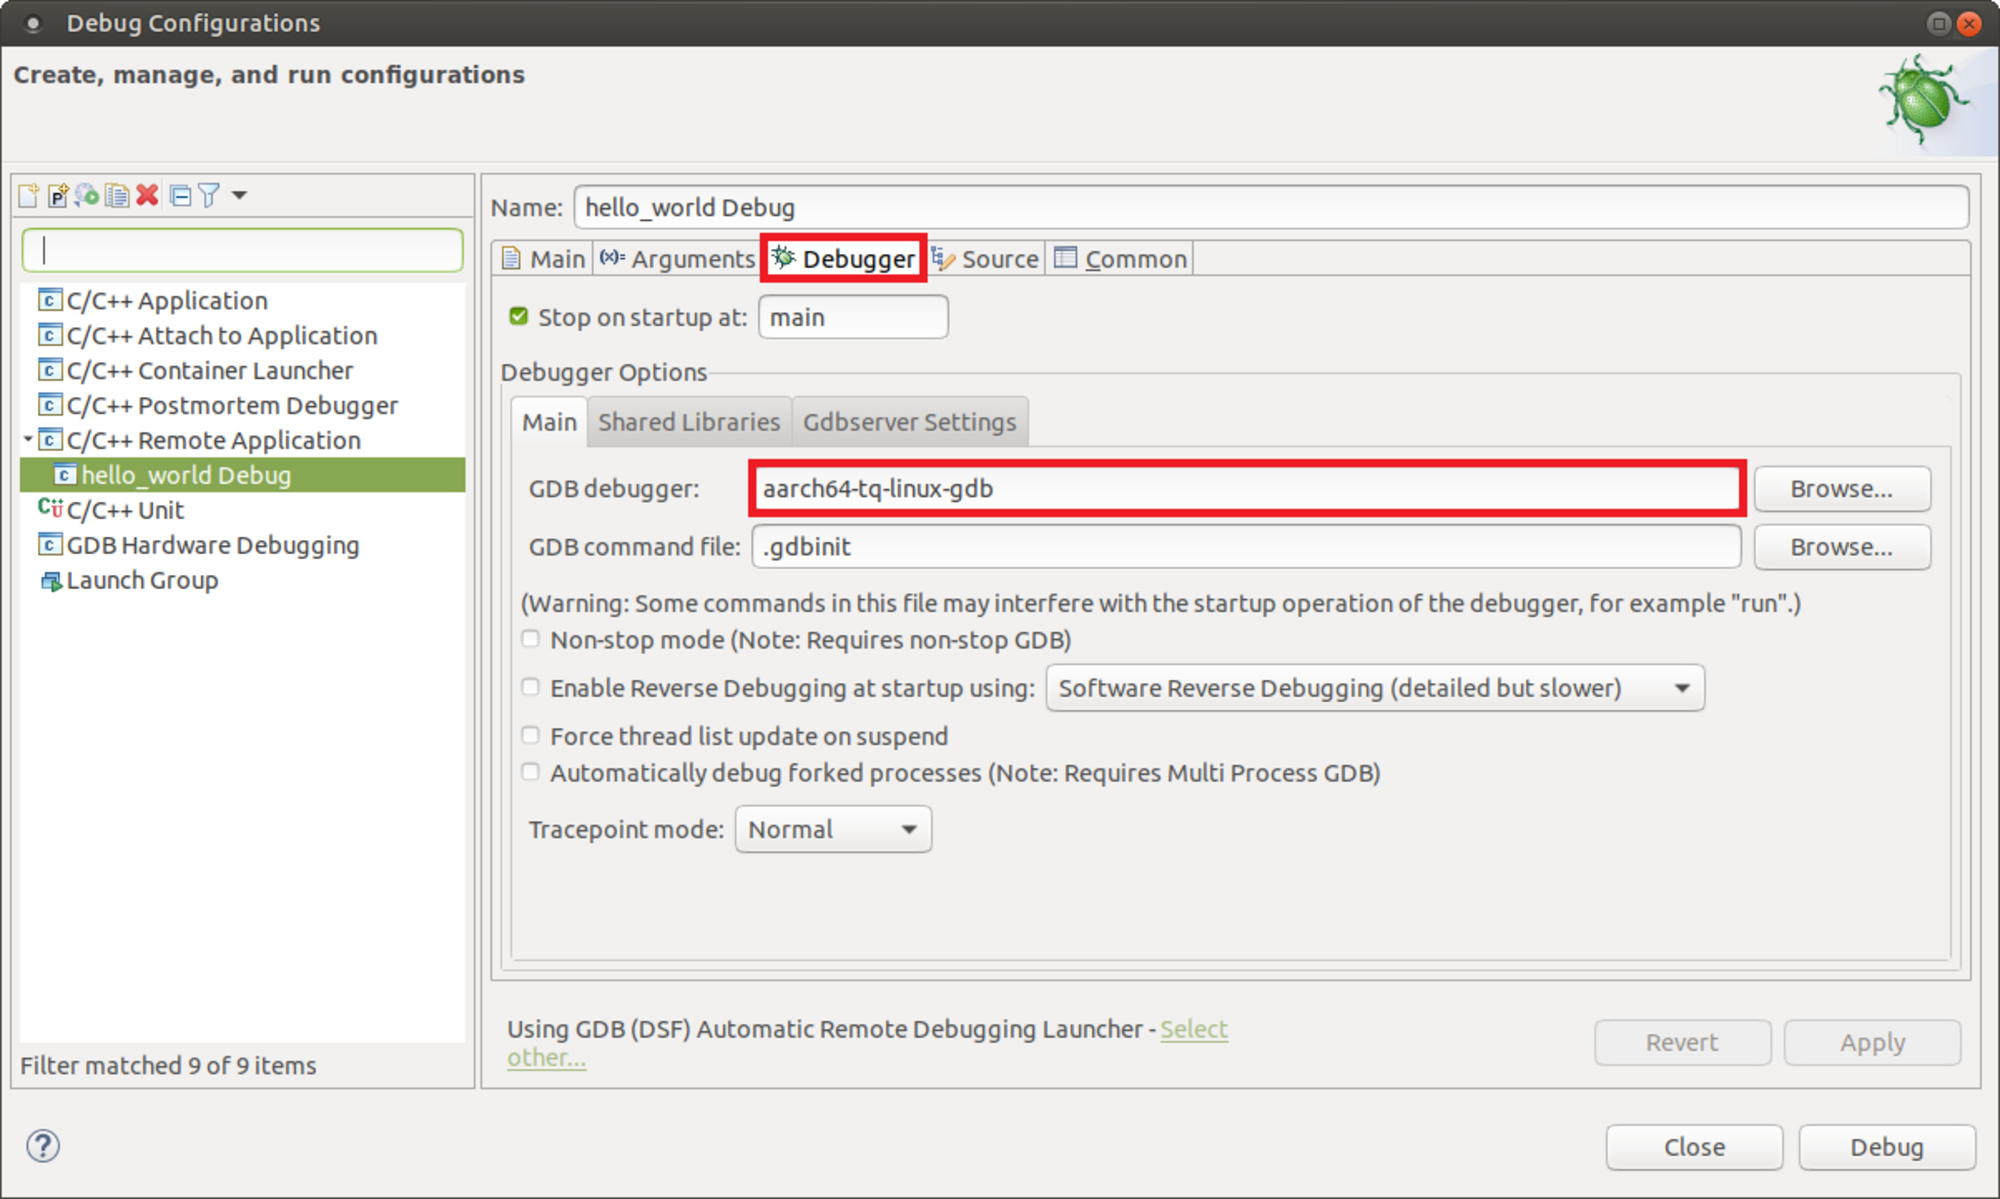
Click apply and close to leave the Debug Configuration
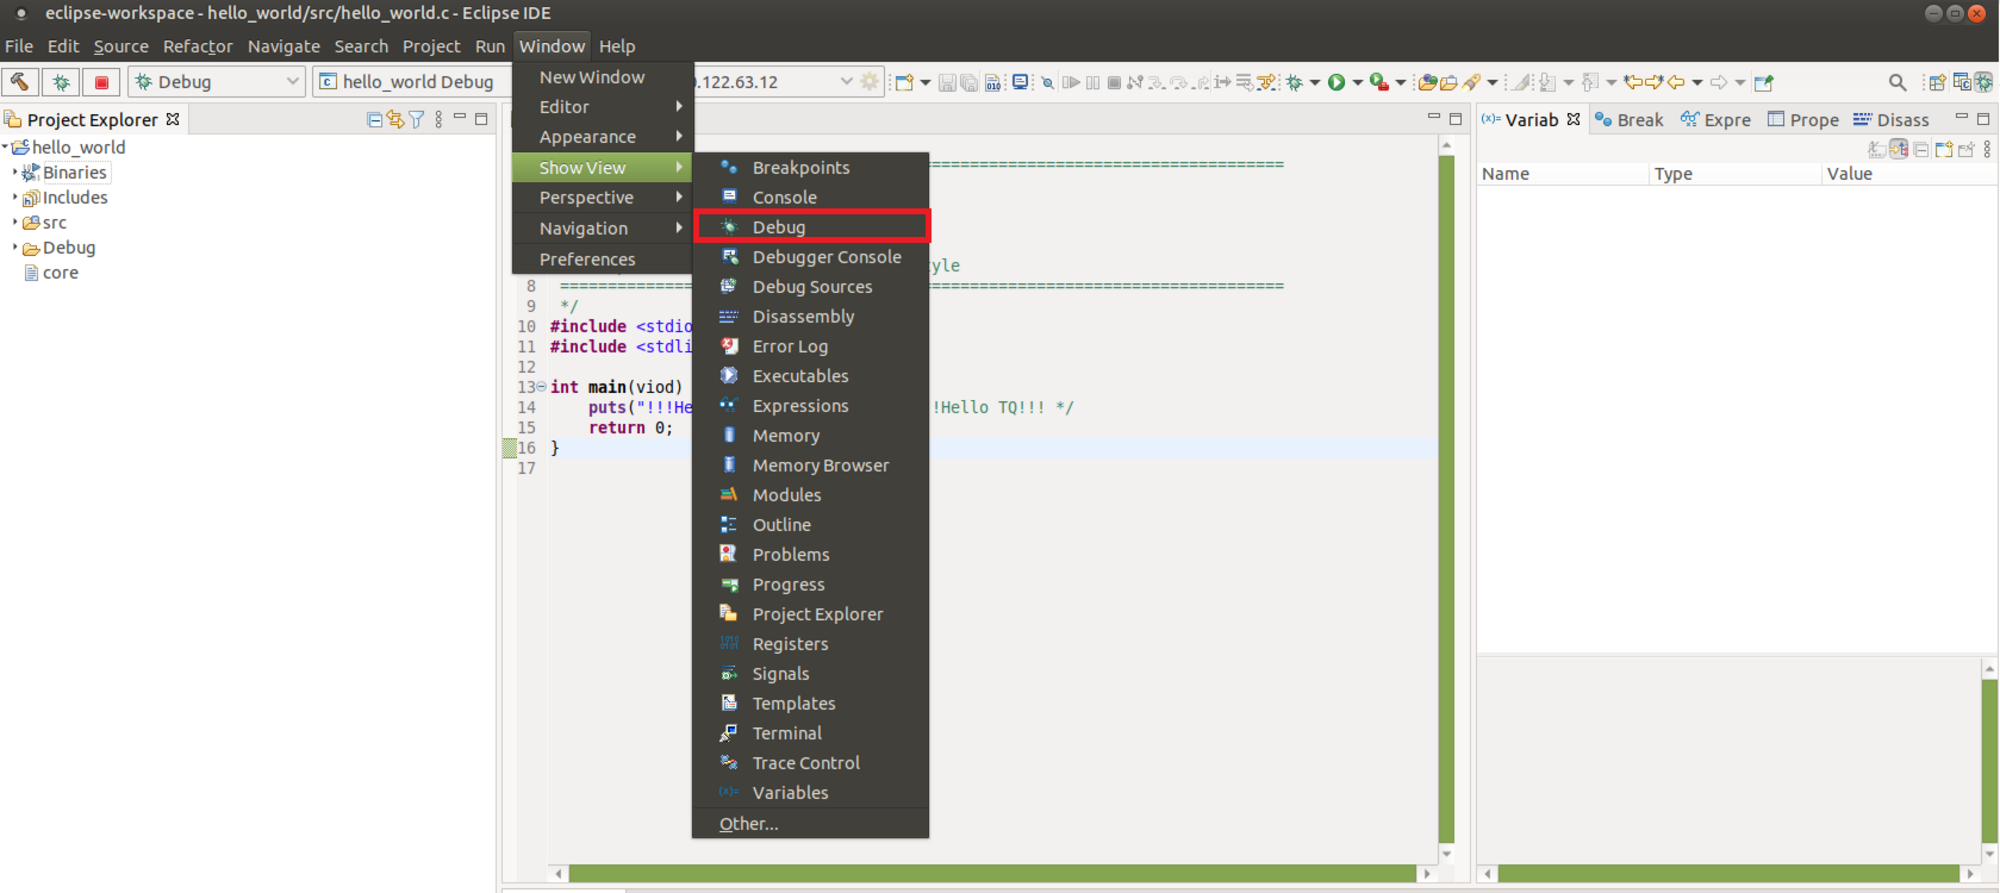
Select Window → Show View → Debug from the menu to add the debug view.
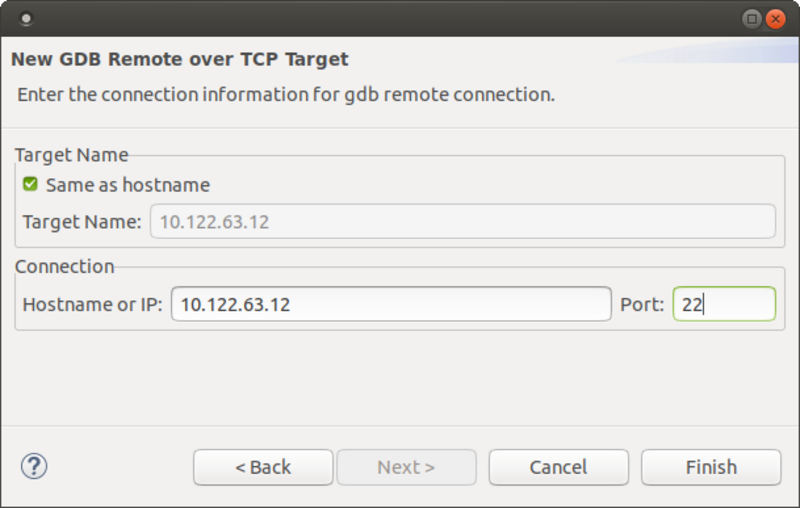
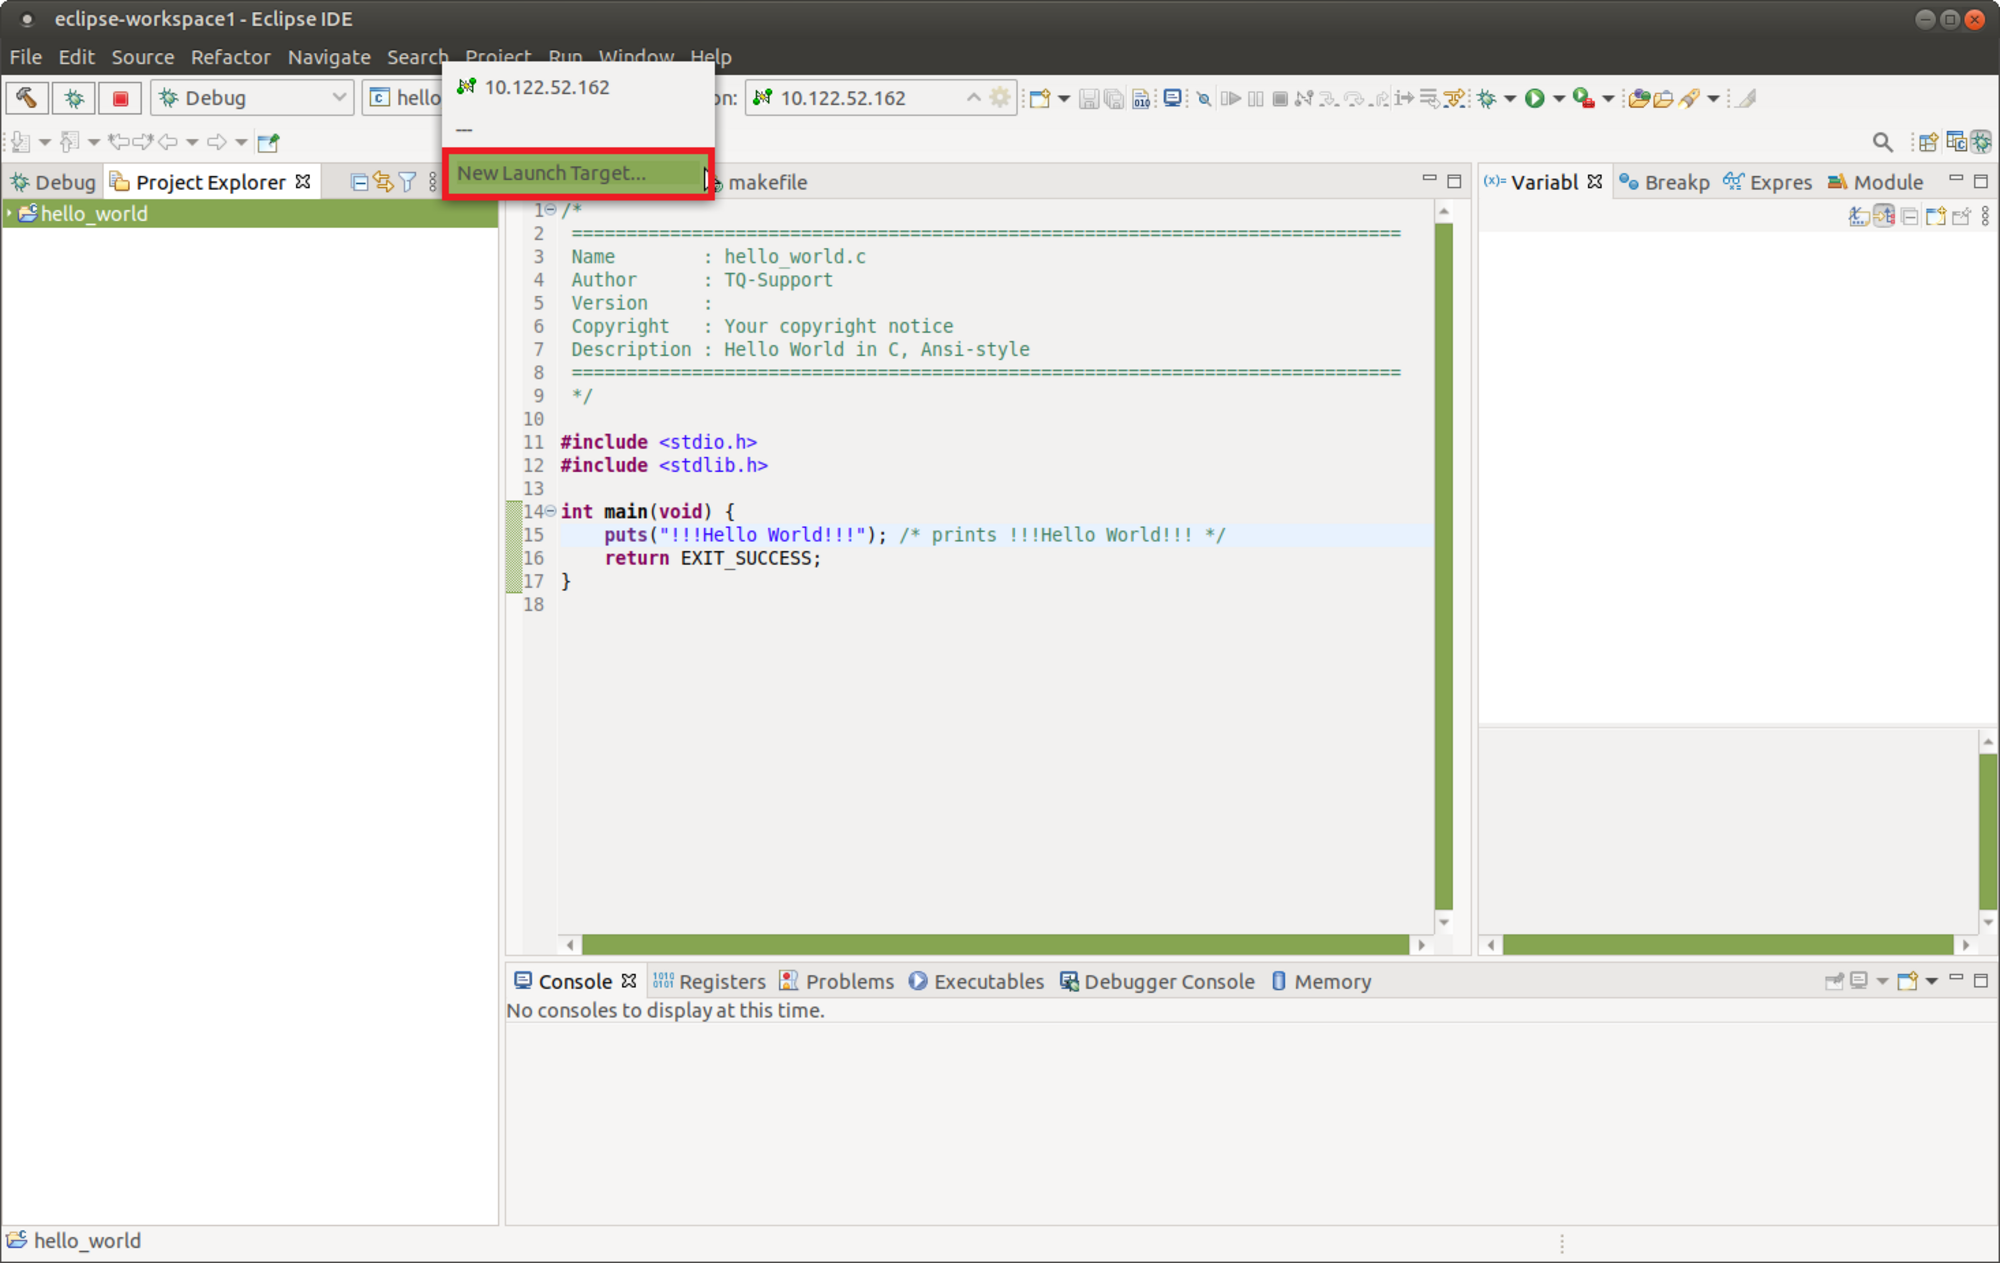
Open the Launch Target drop down menu and select new Launch Target
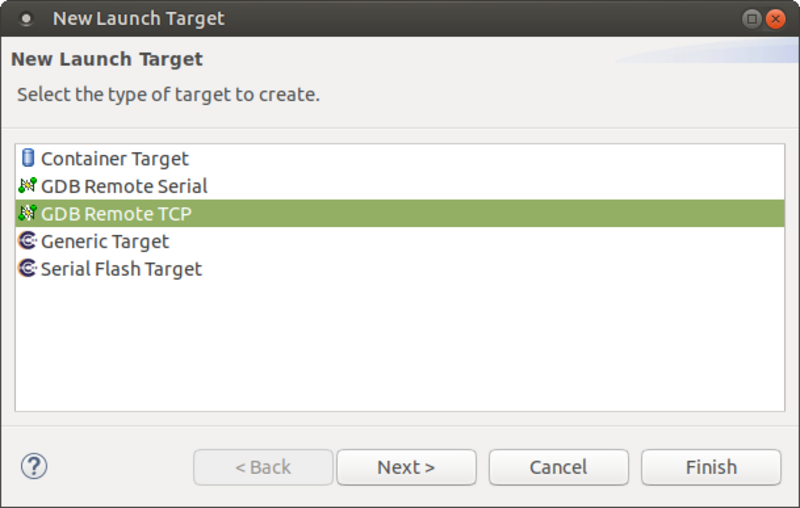
Select GDB Remote TCP in the New Launch Target window and click Next afterwards
Enter the Target IP, by default the SSH port is configured to 22. Click Finish to leave the Launch Target configuration.