TQMxE41S Documentation
UEFI Tools
TQ provides tools from Insyde® for the UEFI BIOS which allows the customization of the BIOS.
Tool access
The following Tools are only available on request.
For further Information please contact Support.
H2OFFT™
Firmware Flash Tool
Firmware Flash Tool for performing BIOS Updates
H2OUVE™
UEFI Variable Editor
UEFI Variable Editor to customize default BIOS Options
H2OLRT™
Logo Replacement Tool
Logo Replacement Tool for a customized boot logo
H2OSDE™
SMBIOS Data Editor
SMBIOS Data Editor to facilitate easy modification of any SMBIOS (DMI) field
H2OEZE™
Easy Binary Editor
Easy Binary Editor to edit binaries in the BIOS, including Option ROMs, driver binaries, logos, and Setup values
H2OFFT (Firmware Flash Tool)
The H2OFFT (Firmware Flash Tool) provides the possibility to update the UEFI firmware under the supported operating systems.
Features
- Save and make a backup file of the current system BIOS before updating with a new one
- Easily update the system BIOS under supported OS environment
- Verify the system BIOS to ensure system reliability
Supported Operating Systems
- EFI Shell
- DOS
- Windows
- Linux
Prerequisites
- FAT formatted USB stick with at least 32 MB of free storage space
- The BIOS-Tools ZIP file
TXE Prepare for Update
For some modules the TXE firmware must be unlocked before the update. Please follow the update instructions on the module page
Flash UEFI Firmware
Flash UEFI Firmware using the EFI Shell
1. Unzip BIOS-Tools ZIP file and copy the following to the USB stick:
<USB-Stick>
    |--- H2OFFT-Sx64.efi
    |--- TQMxE41S_01.22.33.44.55.bin
2. Insert the prepared USB Stick to a Starterkit USB port
3. Boot up the system and navigate into the EFI Shell (Boot Manager > Internal EFI Shell)
4. After starting the EFI Shell switch path to the USB stick by typing fs0:.This depends on the amount of conected mass storage devices; with command ls you can check the content of the path.
5. The following command examples shows how to use the H2OFFT Tool.
Shell> H2OFFT-Sx64.efi TQMxE41S_01.22.33.44.55 –ALL –RA
Flash UEFI Firmware using Windows
1. Unzip BIOS-Tools ZIP file and copy the following to the USB stick:
<USB-Stick>
    |--- InsydeH2OFFT_x86_WINx64_*
          |-- TQMxE41S_01.22.33.44.55.bin
2. Insert the prepared USB Stick to a Starterkit USB port
3. Boot up the system and run Command Prompt as administrator
4. Switch path to the InsydeH2OFFT_x86_WIN64_* folder.
5. Following generic commands shows how to start the BIOS Update for TQMx86 modules.
--------------------------------
TQMxE41S
--------------------------------
> H2OFFT-Wx64 TQMxE41S_01.22.33.44.55 –ALL –RA
Flash UEFI Firmware using Linux
Unzip BIOS-Tools ZIP file and copy the following to the USB stick:
<USB-Stick>
    |--- InsydeH2OFFT_x86_LINUX64_*
          |-- TQMxE41S_01.22.33.44.55.bin
2. Insert the prepared USB Stick to a Starterkit USB port
3. Boot up the system and open terminal
4. Switch path to the InsydeH2OFFT_x86_LINUX64_* folder
5. Extract tar package:
tar -xvf InsydeH2OFFT_x86_LINUX64_portable_*.tar.bz2
6. Install H2OFFT Tool:
sudo dpkg -i InsydeH2OFFT_x86_LINUX64_*.deb
7. Run following generic commands shows how to start the BIOS Update for TQMx86 modules.
--------------------------------
TQMxE41S
--------------------------------
$ sudo h2offt-lx64 TQMxE41S_01.22.33.44.55 –ALL –RA
If the tool reports an IHISI error 13, please ensure that efivarfs is enabled in the Linux kernel and that the efivars partition is mounted (use the “mount” command). If the partition is not listed, mount it with the following command:
mount -t efivarfs none /sys/firmware/efi/efivars
Save and flash configured UEFI
The H2OFFT tool offers the possibility to save the configured UEFI on the current module as a binary file with the settings made, which can then be flashed to other modules again. The procedure does not differ from the used system (EFI, Win, Linux).
Save runtime UEFI to binary
after you have configured your UEFI you can export it as binary with the H2OFFT tool:
H2OFFT-Sx64.efi <Name-of-new-UEFI-Binary> -O

Example:
H2OFFT-Sx64.efi TQMxE41S_new.bin -O
Flash customized UEFI to binary
The flashing of the previously created UEFI image is done in the same way as with the standard UEFI binary.
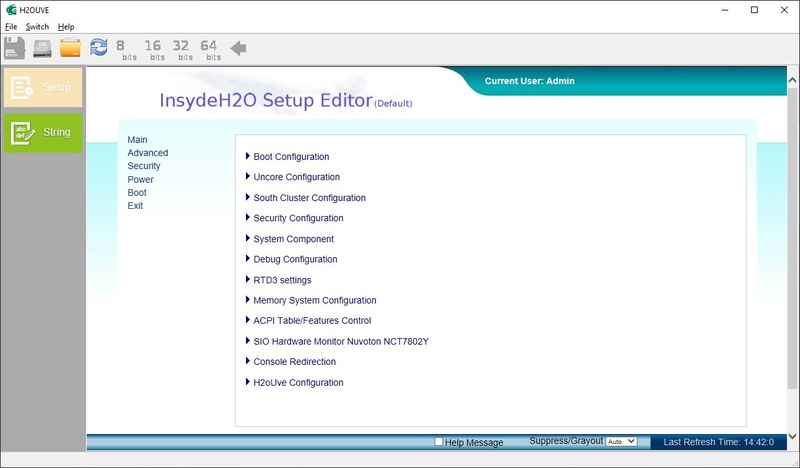
H2OUVE™ (UEFI Variable Editor)
The H2OUVE (UEFI Variable Editor) allows to edit setup settings and variable data of the BIOS Image.
Features
- SCU(Setup) Editor: To edit “runtime/current setup setting” of platform
- Image Setup Editor: To edit “setup Default Setting” of BIOS image
- Variable Editor: To edit “Variable data” at runtime ROM or BIOS image
- Variable Stress Test: Support variable access and stress test on variable at runtime or BIOS image
Supported Operating Systems
- EFI Shell
- DOS
- Windows
- Linux
Prerequisites
<USB-Stick>
    |--- H2OUVE-Sx64.efi
2. Insert the prepared USB Stick to a Starterkit USB port
3. Boot up the system and navigate into the EFI Shell (Boot Manager > Internal EFI Shell)
4. After starting the EFI Shell switch path to the USB stick by typing fs0:.This depends on the amount of conected mass storage devices; with command ls you can check the content of the path.
For a list of all functions the following command can be executed:
H2OUVE-Sx64.efi -h
2. Run H2OUVE-W-GUIx64.exe for a graphical user interface or H2OUVE-W-CONSOLEx64.exe for use via the Command Line Interface (CMD).
When the tool is run on the target system, the BIOS can be loaded and saved directly from the module.
Change Defaults over EFI Shell
The EFI shell can be used to write the defaults of a BIOS image to a config file. This config file contains all possible settings that can also be changed in the runtime BIOS. Afterwards the Config file can be written back into a BIOS image.
Extract BIOS settings to config file
To extract the current BIOS settings from runtime BIOS, the H2OUVE option -gs should be used.
H2OUVE-Sx64.efi -gs <OUTPUT_FILE>
To extract the available BIOS settings from a BIOS binary, the H2OUVE option -gd should be used.
H2OUVE-Sx64.efi -gd <OUTPUT_FILE> -i <BIOS_IMAGE>
The following code uses the BIOS image TQMxE41S_01.22.33.44.55.bin and write the defaults into the file named settings.txt
H2OUVE-Sx64.efi -gd settings.txt -i TQMxE41S_01.22.33.44.55.bin
Change defaults in config file
The default settings of the specified BIOS image are listed in the settings file. The first lines of the settings file explain how the configuration works.
Config File structure
********** "Settings Page Name" **********
(XxXX, X, XXxXXXXX, XxXXX) "Setting Name"
  Callback ID = XxXX
  (0)[*] Disabled  (Default) #Option One (currently selected)
  (1)[] Enabled              #Option Two
Example to activate eMMC Controller
1. Open the Config File with a text editor (e.g. VSCode)
2. Go to the setting that is to be changed (in this case eMMC)
3. Select the option to be enabled by inserting a * between the corresponding brackets:
(0x702, 1, 0x670EEB73D338776D, 0xF4B1) eMMC 5.1 Controller
  Callback ID = 0x5BC
  (0)[*] Disabled  (Default)
  (1)[] Enabled
(0x702, 1, 0x670EEB73D338776D, 0xF4B1) eMMC 5.1 Controller
  Callback ID = 0x5BC
  (0)[] Disabled  (Default)
  (1)[*] Enabled
4. Save the file
Write defaults to BIOS binary
To write the BIOS options from the configuration file back into the BIOS binary, the H2OUVE option -sd should be used.
Command Syntax
H2OUVE-Sx64.efi -sd <SETTINGS_FILE> -i <BIOS_IMAGE>
The following code reads the defaults from in the settings.txt file and writes it into the TQMxE41S_01.22.33.44.55.bin Binary.
H2OUVE-Sx64.efi -sd settings.txt -i TQMxE41S_01.22.33.44.55.bin
After executing the command the specified BIOS binary contains the new defaults and can be programmed to other modules using the H2OFFT tool.
H2OLRT™ (Logo Replacement Tool)
The H2OLRT (Logo Replacement Tool) generates a BIOS file that contains the desired Boot Logo instead of the TQ Logo.
Supported Operating Systems
- EFI Shell
- DOS
Supported logo formats
- JPEG
- PCX
- TGA
- BMP
- GIF
Arguments description
| Variable | Description |
|---|---|
| <SrcBIOSImageName> | BIOS file in which the logo should be replaced |
| <LogoImagePathName> | Path and name of the replacement picture |
| <IndexNum> | Default index, where the picture must be stored. MOD_NAME = LOGO_INDEX |
| <ConvertNum> | 0 = keep original image's format and dimension. 1 [default] = auto convert the image's format and dimension. |
| <OutBIOSImageName> | path and name of the generated BIOS file |
Replace Logo
Flash UEFI Firmware using the EFI Shell
1. Unzip BIOS-Tools ZIP file and copy the following to the USB stick:
<USB-Stick>
    |--- H2OLRT-Sx64.efi
    |--- TQMxXXX.11.22.33.44.55.bin
    |--- Logo.bmp
2. Insert the prepared USB Stick to a Starterkit USB port
3. Boot up the system and navigate into the EFI Shell (Boot Manager > Internal EFI Shell)
4. After starting the EFI Shell switch path to the USB stick by typing fs0:.This depends on the amount of conected mass storage devices; with command ls you can check the content of the path.
5. The following command examples shows how to use the H2OLRT Tool.
Shell> H2OLRT-Sx64.efi -replogo:TQMxXXX.11.22.33.44.55.bin -logopath:Logo.bmp -logoindex:LOGO_INDEX -logoconvert:0 -out:TQMxXXX.11.22.33.44.55_with_Logo.bin
Flash UEFI Firmware using Windows
1. Boot up the system and run Command Prompt as administrator
2. Switch path to the InsydeH2OLRT_x86_DOS_* folder.
3. The following command examples shows how to use the H2OLRT Tool
> H2OLRT-D.exe -replogo:TQMxXXX.11.22.33.44.55.bin -logopath:Logo.bmp -logoindex:LOGO_INDEX -logoconvert:0 -out:TQMxXXX.11.22.33.44.55_with_Logo.bin
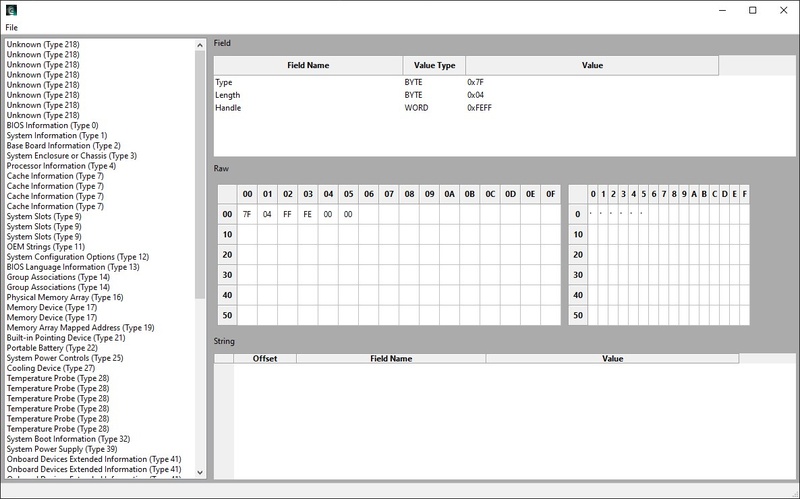
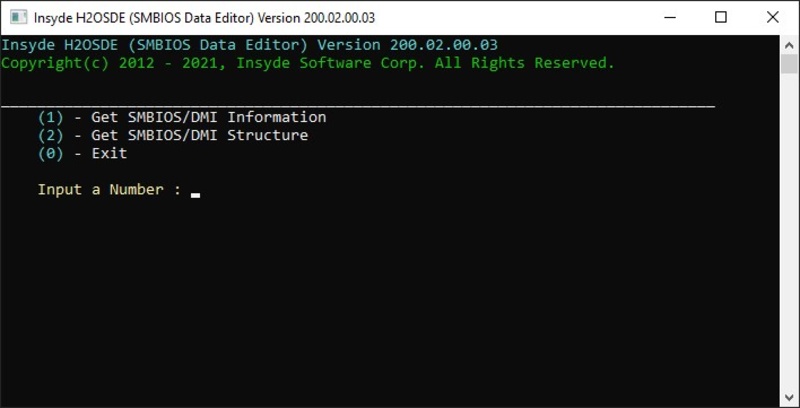
H2OSDE™ (SMBIOS Data Editor)
Features
- H2OSDE Editor : Edits “runtime/current DMI setting” of platform
- H2OSDE File Editor : Edits “DMI data” in DMI file
- H2OSDE Image Editor : Edits “DMI Default Setting” of BIOS image
Supported Operating Systems
- EFI Shell
- DOS
- Windows
- Linux
User Interface Mode
<USB-Stick>
    |--- H2OSDE-Sx64.efi
2. Insert the prepared USB Stick to a Starterkit USB port
3. Boot up the system and navigate into the EFI Shell (Boot Manager > Internal EFI Shell)
4. After starting the EFI Shell switch path to the USB stick by typing fs0:.This depends on the amount of conected mass storage devices; with command ls you can check the content of the path.
To start the tool in user interface mode run the following command:
H2OSDE-Sx64.efi
2. Run GUI.exe for a graphical user interface (only on target module).
2. Boot up the system and run Command Prompt as administrator
3. Switch path to the InsydeH2OSDE_x86_WIN64_* folder
4. Run the following command to start the H2OSDE Tool in user interface mode:
H2OSDE-Wx64.exe
2. navigate to the H2OSDE program path and run following command:
$ cd "Path_to_H2OSDE-File"
$ sudo ./gui
3. Alternatively, the program can also be executed in the terminal:
$ sudo ./h2osde-lx64
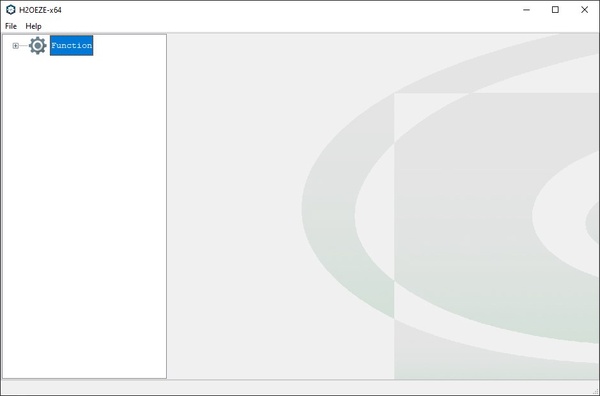
H2OEZE™ (Easy Binary Editor)
The H2OEZE tool is designed to provide functions that allow users to replace the content of BIOS image or to modify the initial value in the BIOS image including Option ROMs, driver binaries, logos, and Setup values
Supported Operating Systems
- Windows
- Linux
Prerequisites
1. Unzip BIOS-Tools ZIP file for Windows
2. Run H2OEZE-x64.exe for a graphical user interface.
Load BIOS Image File
1. goto File and select “Load BIOS Image From…“
2. Select BIOS Image (Change Datatype to “All Files” to find .bin files)
Change Boot Logo
1. goto Components and select Logo
2. Select the TQ logo in the drop-down image, since it is located at the index number of the boot logo and should be replaced by the new one
3. Klick the “Browse” button to select the new Logo Image or paste the path to the file
4. Press “Yes” in the popup if you want your new logo to be converted to the size of the old logo
